
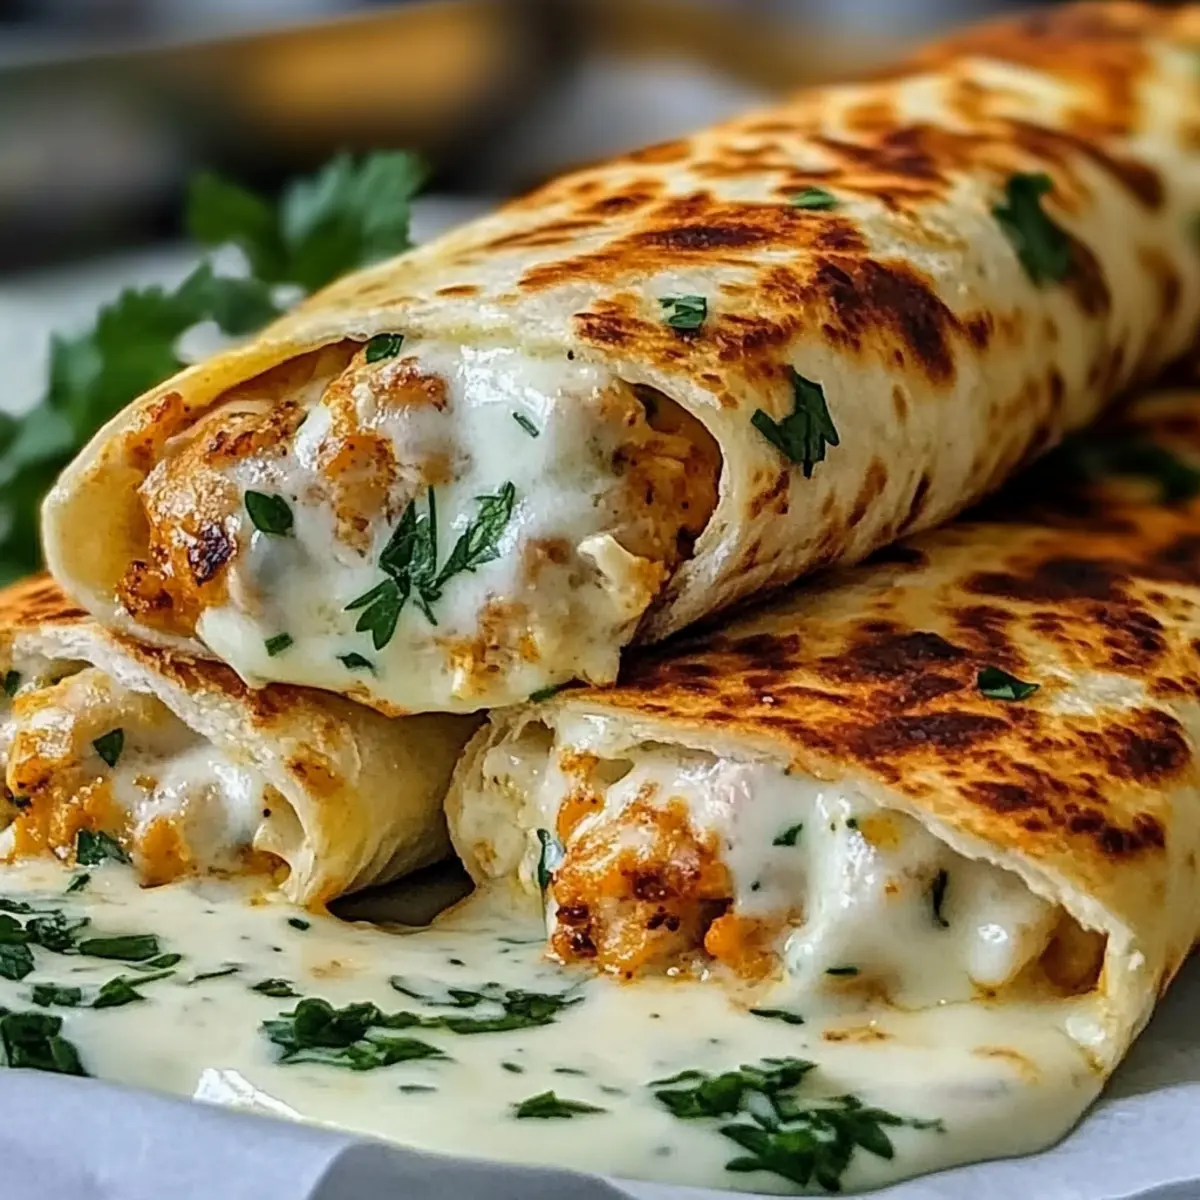
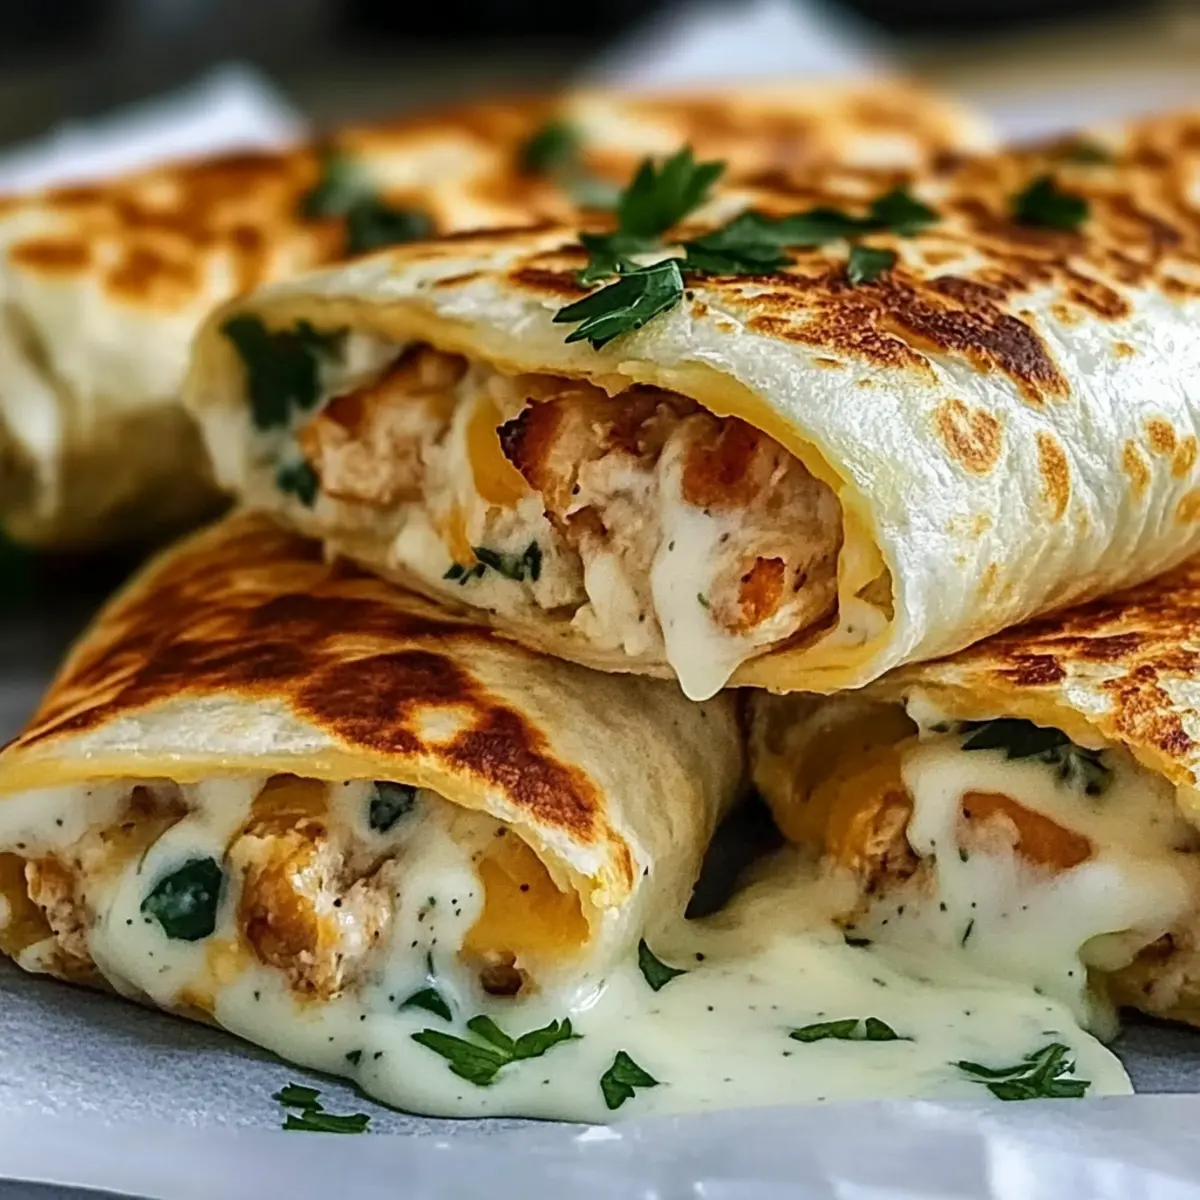
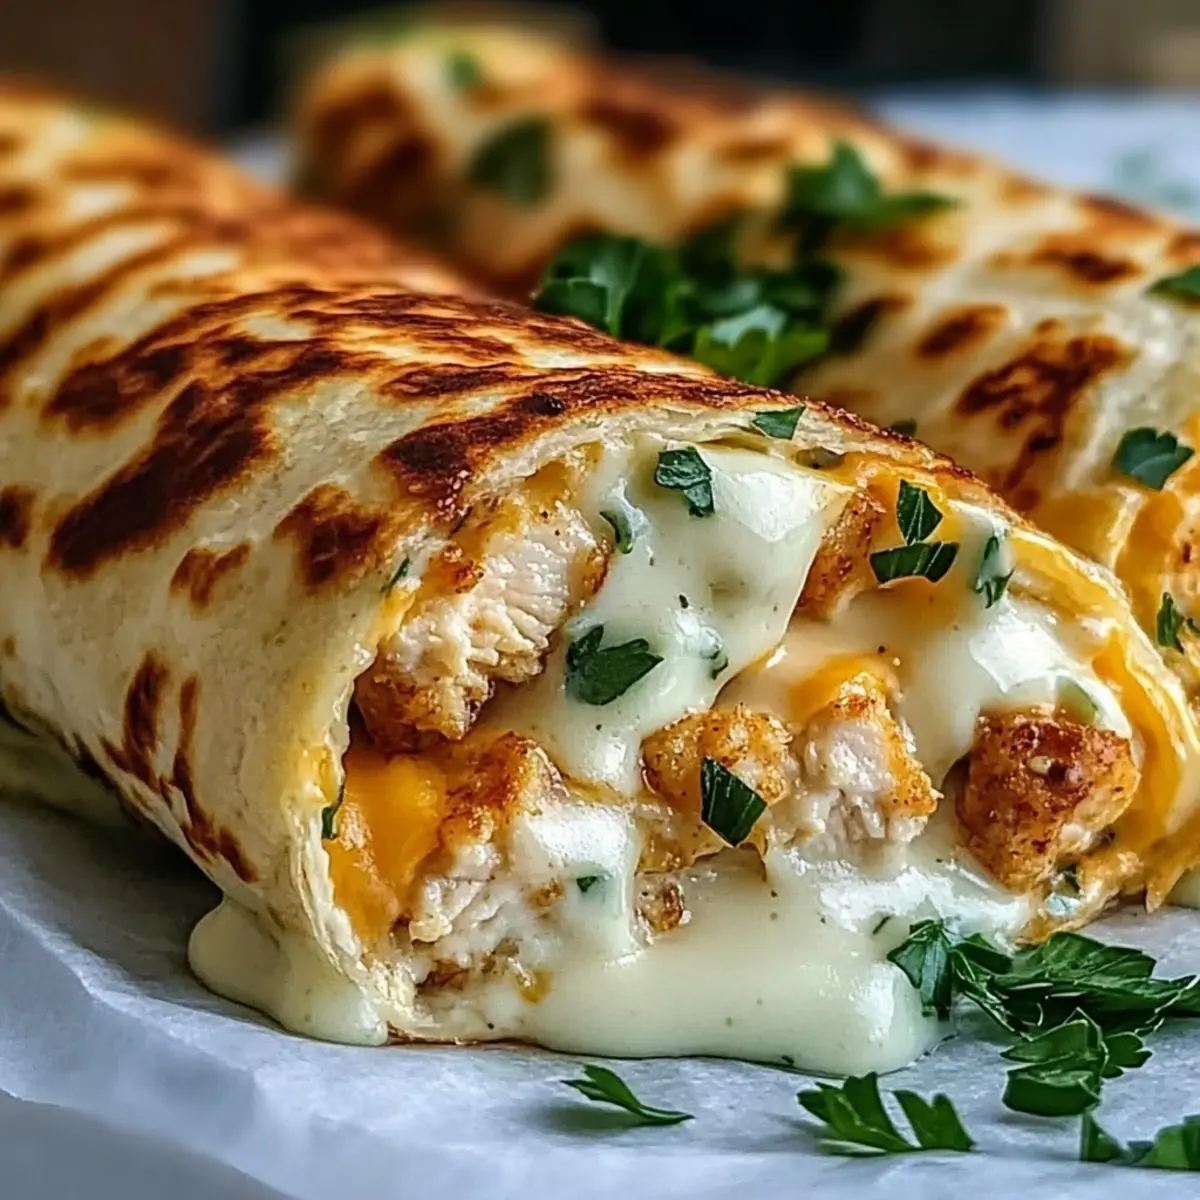
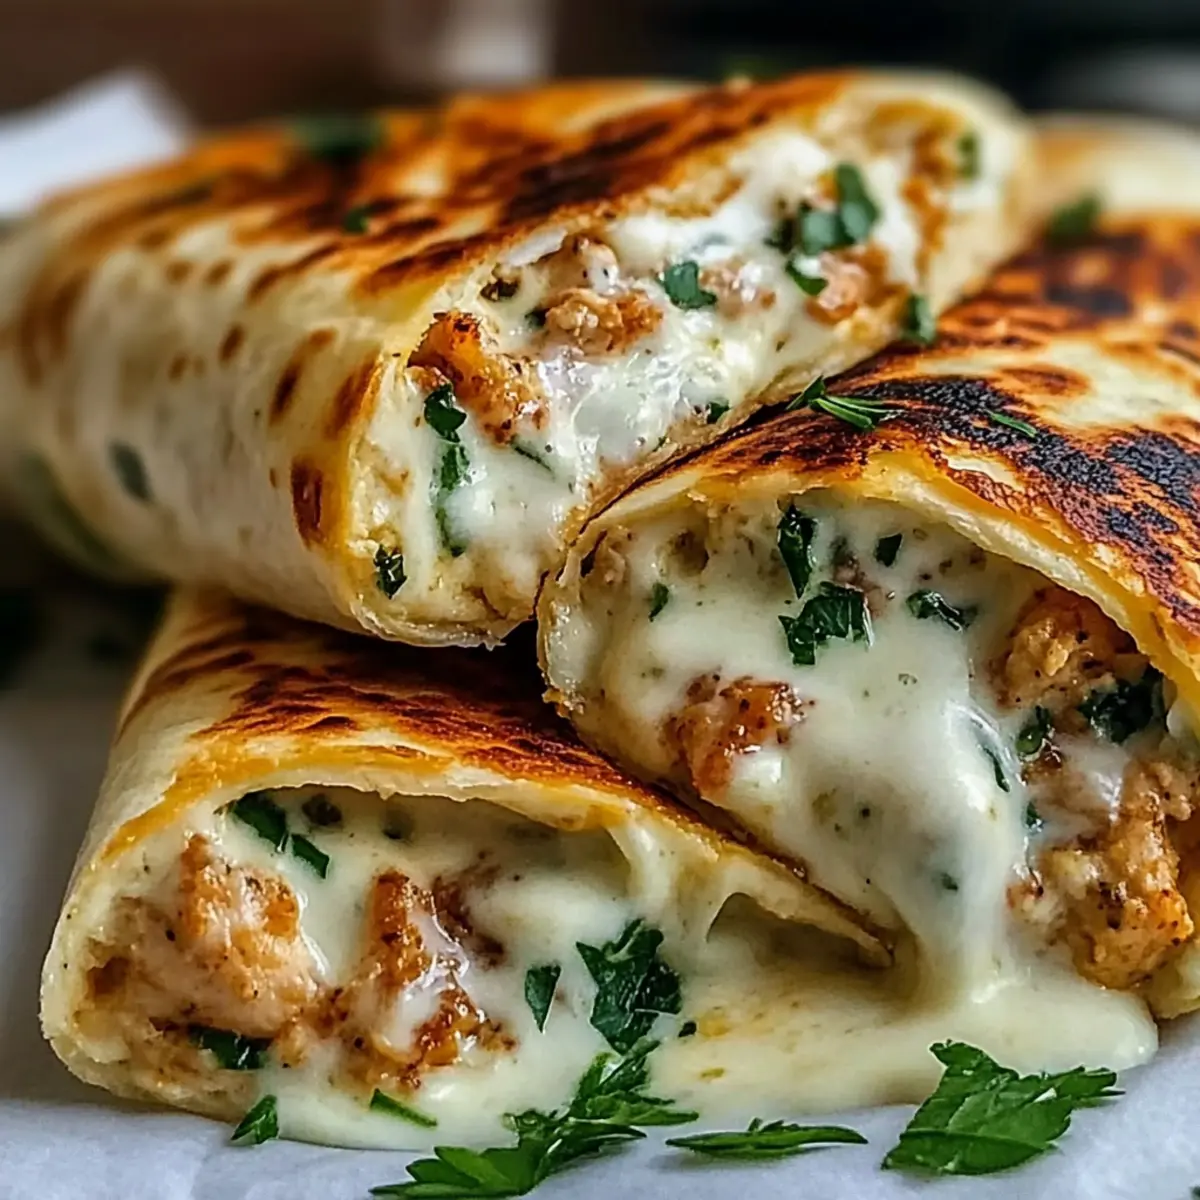
As I simmered garlic in the pan, the aroma enveloped my kitchen, whispering promises of dinner delight. Today, I’m showcasing my Low Carb Cheesy Garlic Chicken Wraps, a dish that turns weeknight meals into savory celebrations. These wraps are an absolute lifesaver, taking just 20 minutes to prepare while offering a guilt-free indulgence that’s rich in flavor. With the convenience of rotisserie chicken, you can assemble this tasty treat quickly, making it perfect for busy evenings. Plus, they’re low-carb and high-protein, ensuring you satisfy your cravings without the afternoon crash. Curious how to whip them up and impress your loved ones? Let’s dive into this delicious adventure!
Why are these wraps a must-try?
Flavor Explosion: Each bite bursts with savory garlic and delicious cheese, making meal time exciting and satisfying.
Quick & Easy: In just 20 minutes, you can whip up these wraps, perfect for busy weeknights when time is tight.
Low-Carb Delight: Ideal for keto enthusiasts, these wraps provide a filling dinner without the guilt of high carbs.
Crowd-Pleaser: Whether for family or friends, these wraps guarantee smiles all around — a surefire hit at any gathering!
For a balanced meal, consider pairing them with a refreshing cucumber tomato salad or roasted veggies. Enjoy this delicious adventure!
Low Carb Cheesy Garlic Chicken Wraps
These wraps are a delight, bringing flavors and convenience together.
For the Filling
- Cooked Chicken Breast – Main protein source; using rotisserie chicken adds flavor and saves time.
- Shredded Mozzarella Cheese – Provides creaminess and melt; freshly shredded ensures the best texture.
- Shredded Cheddar Cheese – Adds tangy depth; feel free to substitute with your favorite melting cheese for variation.
- Minced Garlic – Infuses the mixture with aromatic flavor; fresh garlic makes a significant difference.
- Cream Cheese – Binds the filling and adds a luscious texture; soften it before mixing for easy incorporation.
- Baby Spinach – Optional for added nutrients and a pop of color; a great way to sneak in some greens.
For Cooking
- Olive Oil – Used for toasting wraps to a crispy finish; avocado oil is a good substitute if desired.
- Low-Carb Tortillas – Essential for holding the filling; brands like Mission Carb Balance work wonderfully.
Seasoning & Garnish
- Salt and Pepper – Basic seasonings to enhance flavor; adjust quantities according to your taste preferences.
- Fresh Parsley – Adds a fresh, herbal note to brighten the dish; optional but highly recommended for a garnish.
This flavorful and satisfying recipe for Low Carb Cheesy Garlic Chicken Wraps is sure to become a staple in your weeknight meals!
Step‑by‑Step Instructions for Low Carb Cheesy Garlic Chicken Wraps
Step 1: Preheat the Skillet
Begin by preheating a large skillet over medium heat for about 2 minutes. Add a tablespoon of olive oil to the pan, allowing it to warm up until shimmering. This step is essential for achieving that crispy, golden texture on your wraps later.
Step 2: Warm the Tortillas
While the skillet heats, take your low-carb tortillas and wrap them in a damp paper towel. Microwave them for 10-15 seconds to soften, making them more pliable for rolling. This little trick helps prevent cracking when assembling your Low Carb Cheesy Garlic Chicken Wraps.
Step 3: Mix the Filling
In a large mixing bowl, combine the shredded rotisserie chicken, mozzarella cheese, cheddar cheese, softened cream cheese, minced garlic, and fresh parsley. Add salt and pepper to taste. Use a sturdy spatula to mix everything until the cream cheese evenly coats the other ingredients, creating a rich and creamy filling that bursts with flavor.
Step 4: Assemble the Wraps
Take a warm tortilla and place about 1/2 cup of the chicken and cheese filling in the center. Roll the tortilla tightly, tucking in the sides as you go to create a secure wrap. Repeat this process for the remaining tortillas and filling, ensuring each wrap is filled adequately but not overstuffed to prevent splitting.
Step 5: Cook the Wraps
Carefully place the assembled wraps seam-side down in the preheated skillet. Cook each wrap for 2-3 minutes or until they turn a beautiful golden brown and the cheese begins to ooze from the sides. Make sure to flip them halfway through for even browning, creating that perfect crunchy exterior.
Step 6: Serve Hot
Once cooked, remove the wraps from the skillet and let them sit for a minute to cool slightly. Slice each wrap diagonally for an appealing presentation, and consider garnishing with freshly chopped parsley for added freshness. Enjoy your delicious Low Carb Cheesy Garlic Chicken Wraps right away, savoring every bite!
What to Serve with Low Carb Cheesy Garlic Chicken Wraps
These delectable wraps are perfect for creating a balanced and satisfying meal that your family will love.
-
Cucumber Tomato Salad: This refreshing salad adds a crisp, cool contrast, enhancing the garlic flavors of the wraps for a delightful balance.
-
Roasted Vegetables: Caramelized veggies like zucchini and bell peppers provide a sweet earthiness, complementing the savory cheesy goodness in your wraps.
-
Arugula Salad: Light and peppery, arugula mixed with a lemon vinaigrette brings brightness, cutting through the richness of the wraps.
-
Creamy Avocado Dip: A luscious avocado dip drizzled with lime will perfectly match the cheesy wraps while adding creaminess.
-
Sparkling Water with Lemon: Stay refreshed with a bubbly drink that cleanses your palate, offering a light finish to your meal without any heaviness.
-
Cheesecake Bites: For a sweet ending, whip up tiny cheesecake bites that maintain the low-carb theme, delivering a satisfying dessert experience.
These pairings will transform your Low Carb Cheesy Garlic Chicken Wraps into a truly memorable meal!
Storage Tips for Low Carb Cheesy Garlic Chicken Wraps
Fridge: Store leftover wraps in an airtight container in the refrigerator for up to 2 days to maintain freshness and prevent sogginess.
Freezer: To freeze, wrap each individual Low Carb Cheesy Garlic Chicken Wrap in plastic wrap and then place them in a freezer bag. They can be frozen for up to 2 months.
Reheating: For best results, reheat wraps in the oven at 350°F for 8-10 minutes to restore their crispy exterior. You can also use a skillet for a quick reheat, cooking them seam-side down for 2-3 minutes.
Thawing: When ready to enjoy, thaw frozen wraps in the fridge overnight before reheating for optimal texture.
Expert Tips for Low Carb Cheesy Garlic Chicken Wraps
-
Filling Balance: Avoid overfilling the wraps. Too much filling can lead to splitting during cooking, making it messy to eat.
-
Cheese Quality: Use freshly shredded mozzarella for the best melt and texture. Pre-packaged shredded cheese often contains anti-caking agents that prevent smooth melting.
-
Proper Toasting: Don’t skip the toasting step! Toasting the wraps ensures a crispy exterior and enhances the overall flavor of your Low Carb Cheesy Garlic Chicken Wraps.
-
Tortilla Care: Warm your low-carb tortillas before assembly. This prevents cracking and makes them easier to roll, achieving a seamless wrap.
-
Customization: Feel free to explore different add-ins, such as jalapeños or sautéed mushrooms, to elevate your wraps and cater to personal taste preferences.
Low Carb Cheesy Garlic Chicken Wraps Variations
Feel free to get creative and make these wraps your own, adding personal touches for delightful flavor combinations!
-
Dairy-Free: Substitute cream cheese with vegan cream cheese and use nut-based cheese for a creamy texture without dairy.
-
Spicy Kick: Add chopped jalapeños or a sprinkle of red pepper flakes to the filling for a zesty heat that awakens your palate.
-
Meat Swap: Use leftover turkey, pulled pork, or even crumbled bacon for an exciting twist on proteins — the possibilities are endless!
-
Vegetable Boost: Enhance nutrition by adding sautéed bell peppers, mushrooms, or zucchini to the filling, creating a colorful mix rich in flavors.
-
Herb Infusion: Try different herbs like basil or cilantro instead of parsley for a fresh, herbaceous pop that complements the garlic beautifully.
-
Zesty Creaminess: Blend in some ranch seasoning or a splash of lemon juice to the filling for an exciting flavor lift that’s both creamy and tangy.
-
Tortilla Alternatives: Opt for lettuce wraps for a refreshing, low-carb version, perfect for those seeking extra crispness!
-
Flavorful Garnishes: Elevate your wrap presentation with avocado slices or a dollop of guacamole for added creaminess and richness that delights.
For a complete meal, consider serving these wraps alongside a light cucumber tomato salad or enjoy pairing them with a hearty roast for a family favorite!
Make Ahead Options
These Low Carb Cheesy Garlic Chicken Wraps are perfect for meal prep enthusiasts! You can prepare the filling, consisting of shredded chicken, cheeses, minced garlic, and seasonings, up to 24 hours in advance by mixing everything together and storing it in an airtight container in the refrigerator. To maintain quality, keep the tortillas separate, as this prevents them from becoming soggy. When you’re ready to enjoy, simply warm the tortillas and fill them with the mixture, roll them up tightly, and crisp them up in the skillet for 2-3 minutes per side. This way, you’ll have a quick, delicious meal ready to go on hectic weeknights!
Low Carb Cheesy Garlic Chicken Wraps Recipe FAQs
What is the best way to select ripe ingredients for this recipe?
Absolutely! When choosing your cooked chicken breast, opt for rotisserie chicken for its flavor and convenience. Look for chicken that’s moist and not dried out, as this will keep your wraps juicy. For the cheese, freshly shredded mozzarella is ideal for meltability — be sure to check that it’s not pre-packaged, since those often don’t melt as well due to added anti-caking agents. Fresh garlic should be firm and plump, without any dark spots or sprouting.
How should I store leftover wraps?
Leftover Low Carb Cheesy Garlic Chicken Wraps can be stored in an airtight container in the refrigerator for up to 2 days. To keep them fresh and prevent sogginess, consider placing parchment paper between wraps. To reheat, I recommend popping them in the oven at 350°F for 8-10 minutes to regain that delightful crispiness.
Can I freeze these wraps, and if so, how?
Very! To freeze your wraps, wrap each one individually in plastic wrap, ensuring they are sealed tightly. Then transfer them into a freezer-safe bag and store them in the freezer for up to 2 months. When you’re ready to savor them, simply thaw the wraps in the refrigerator overnight before reheating.
What are some common issues I might face while making these wraps?
One common issue is overfilling the wraps, which can lead to tearing and mess during cooking. To avoid this, keep your filling to about 1/2 cup per wrap and roll them gently but firmly. Another tip is to always ensure your tortillas are warmed before rolling — this helps prevent cracking and makes them easier to work with.
Are there any dietary considerations for this recipe?
Absolutely! These Low Carb Cheesy Garlic Chicken Wraps are great for those following a low-carb or keto diet. However, if you’re serving others, be mindful of potential allergies — the recipe contains dairy, so it may not be suitable for those with lactose intolerance or dairy allergies. For a gluten-free option, simply choose gluten-free low-carb tortillas.
Can I adapt this recipe to include different ingredients?
The more the merrier! You can experiment with various cheeses, like pepper jack for a spicy kick or gouda for a smoky twist. Adding sautéed vegetables such as mushrooms or jalapeños can also enhance flavor and texture, making the wraps even more delectable. Enjoy making these your own!
Delicious Low Carb Cheesy Garlic Chicken Wraps in 20 Minutes
Ingredients
Equipment
Method
- Preheat a large skillet over medium heat for about 2 minutes, adding olive oil until shimmering.
- Microwave low-carb tortillas wrapped in a damp paper towel for 10-15 seconds until softened.
- In a large mixing bowl, combine the shredded chicken, mozzarella, cheddar, cream cheese, minced garlic, and fresh parsley. Add salt and pepper to taste, mixing until well combined.
- Take a warm tortilla and place about 1/2 cup of the filling in the center, rolling tightly and tucking in the sides.
- Cook the wraps seam-side down in the skillet for 2-3 minutes until golden brown, flipping halfway for even cooking.
- Remove from the skillet and let cool slightly before slicing each wrap diagonally and serve hot.
Leave a Reply