
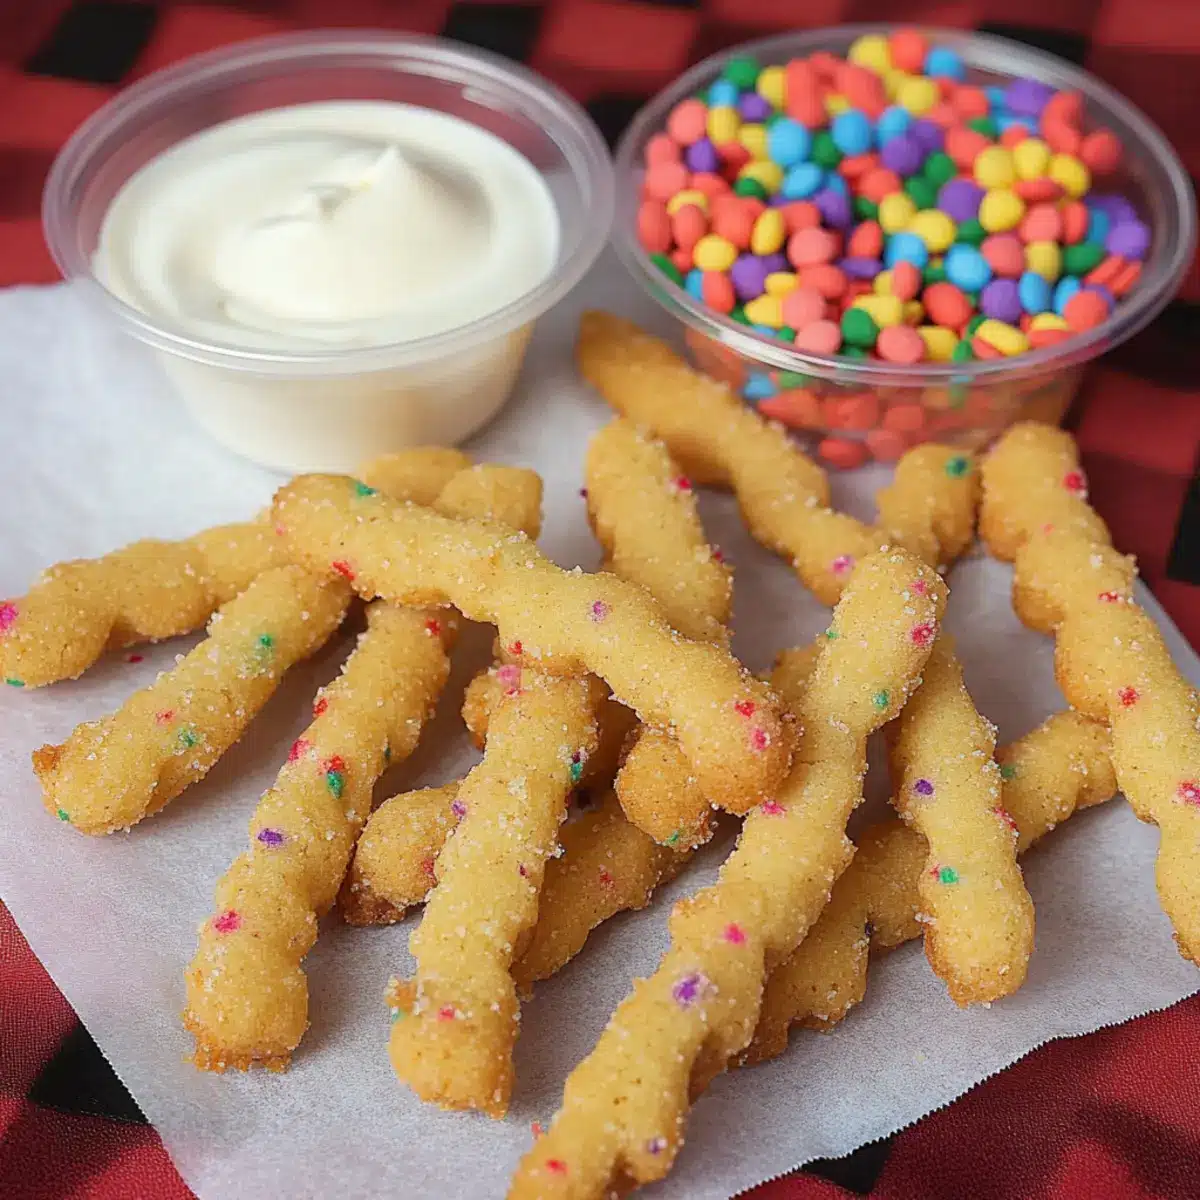
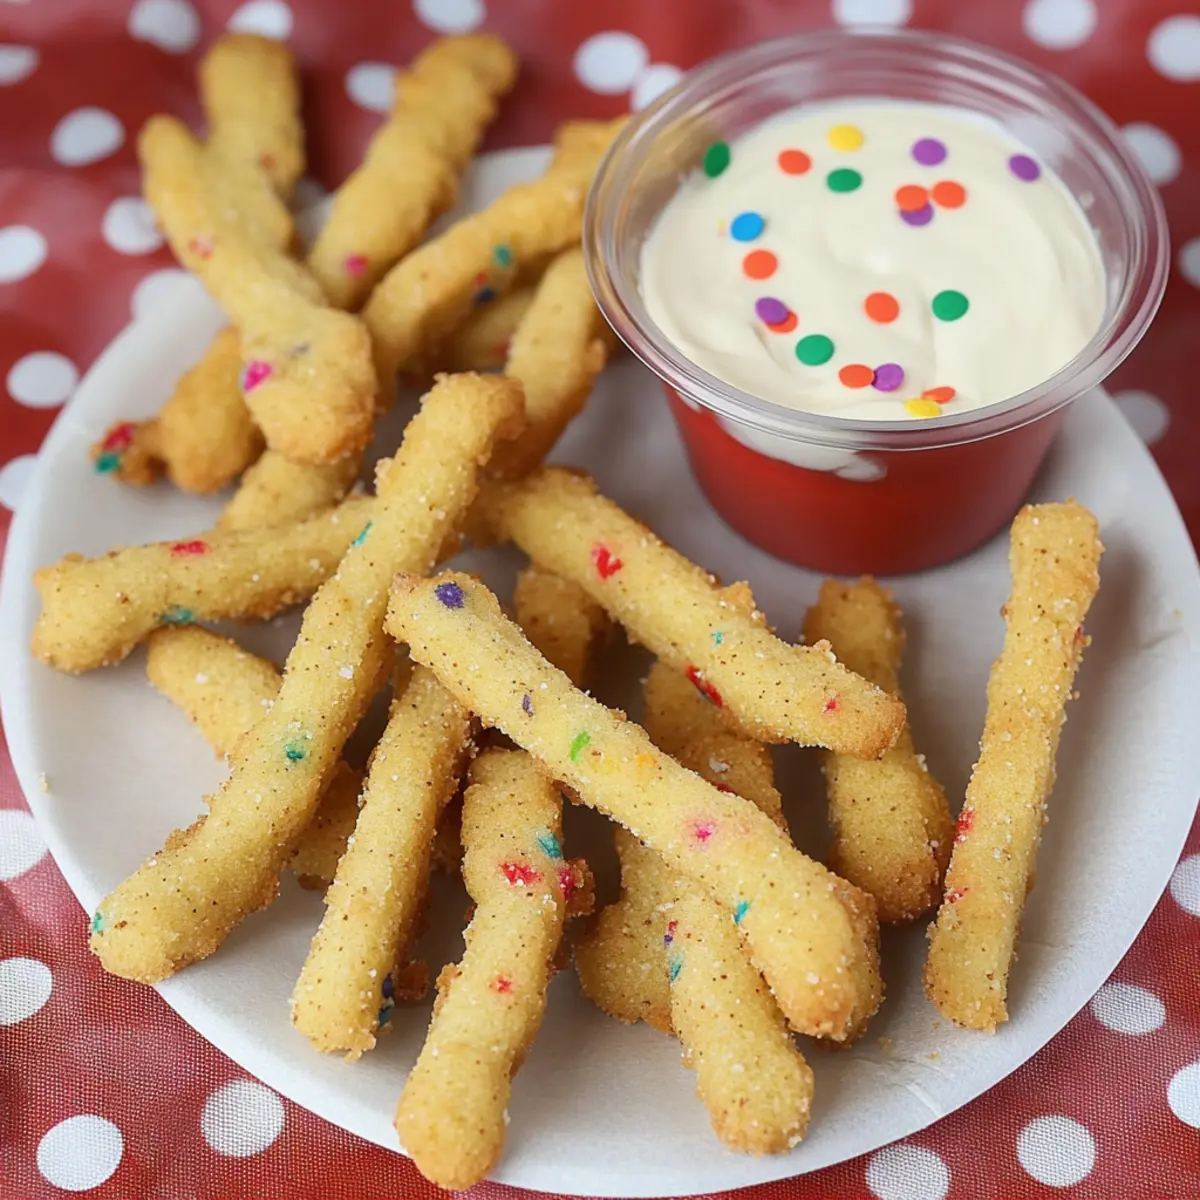
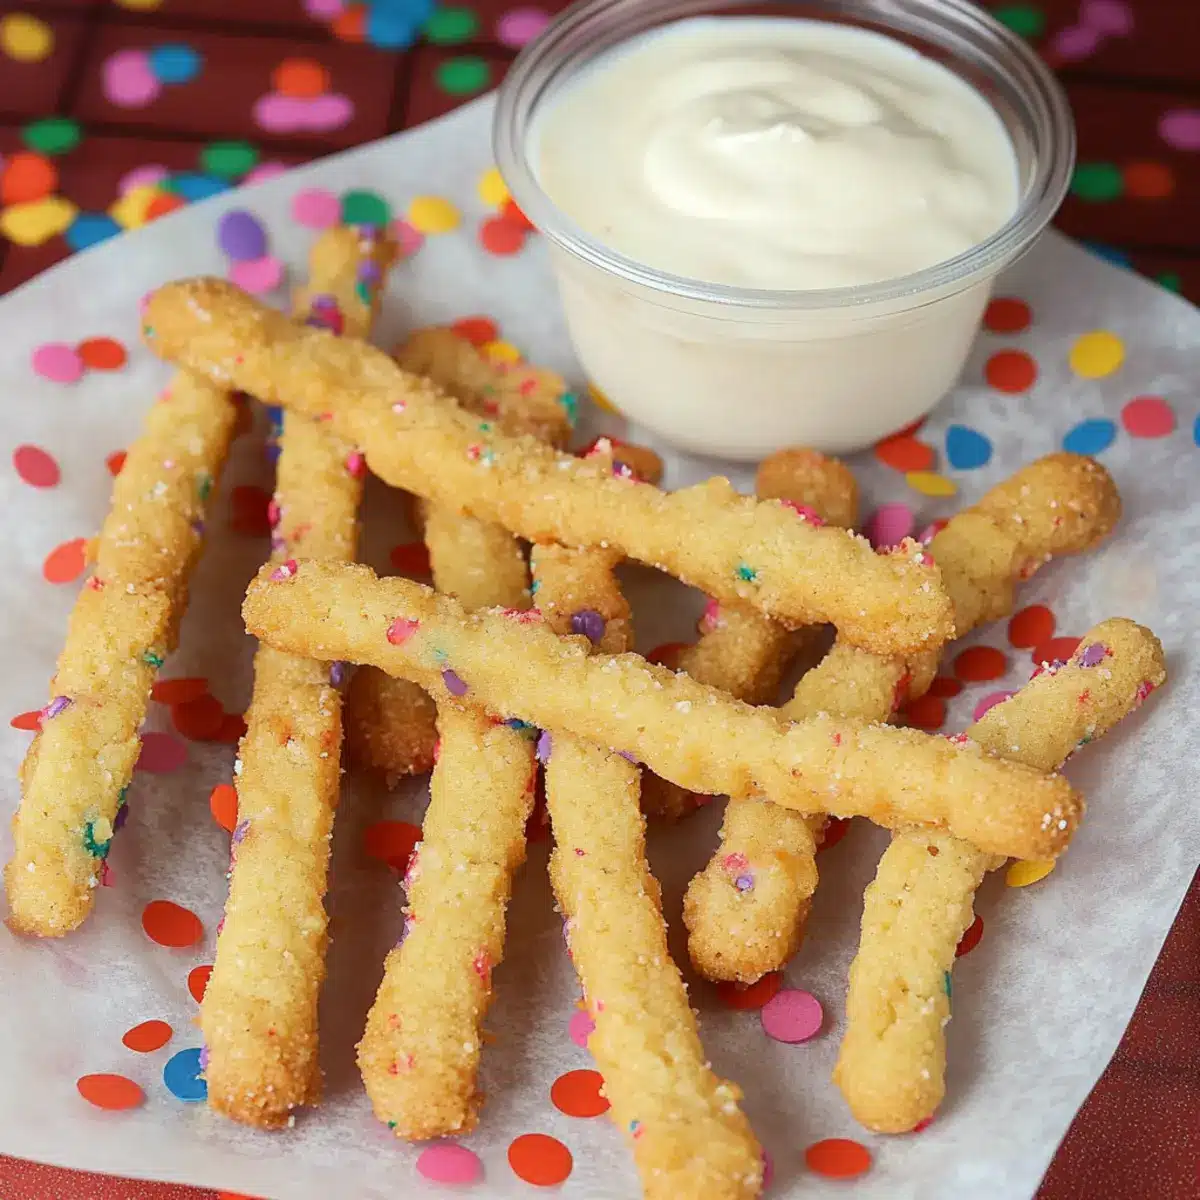
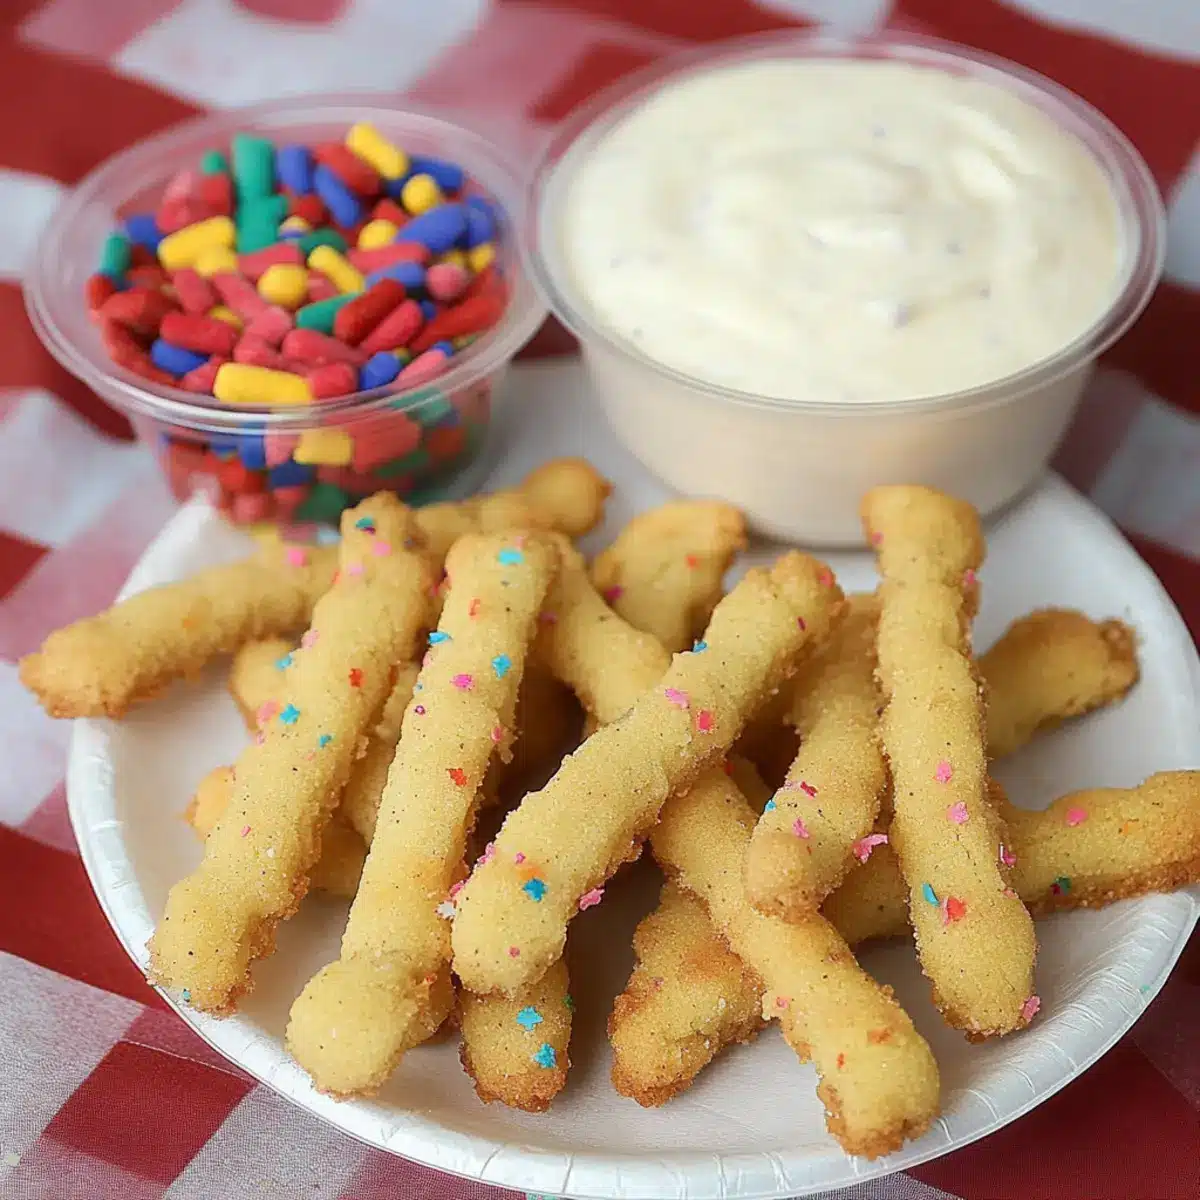
Who says fries have to be savory? My kitchen recently transformed into a playground of sweet creativity when I whipped up these Cookie Fries with Frosting Dip. Imagine biting into a crispy, golden exterior that gives way to a soft, buttery center, perfect for dunking in a smooth, luscious frosting. These delightful treats not only make for a fun family activity, but they’re also an impressive dessert that will have your guests raving. Quick to prepare and utterly irresistible, you’ll find yourself reaching for these cookie fries again and again. Ready to dive into the world of playful desserts? Let’s get started!
Why Are Cookie Fries So Irresistible?
Delightfully Fun: These Cookie Fries turn an ordinary dessert into a playful experience, making them perfect for family gatherings or parties.
Crispy and Soft: The unique combination of a crunchy exterior with a soft, buttery inside creates a textural delight that you’re sure to love.
Dunk, Dip, Devour: The easy-to-make frosting dip takes your cookie experience to another level, allowing you to customize with flavors and toppings.
Quick and Easy: With simple ingredients and straightforward instructions, you’ll have these cookie fries ready in no time—perfect for those spontaneous dessert cravings!
Versatile Treat: From birthday parties to cozy nights in, these cookie fries are a versatile addition to any occasion. They pair wonderfully with other treats like Unicorn Dip Whimsical for endless fun!
Cookie Fries with Frosting Dip Ingredients
For the Cookie Fries
- Flour – Provides structure; for gluten-free options, substitute with your favorite gluten-free flour.
- Cornstarch – Lightens the texture; essential for achieving that perfect crispiness.
- Kosher Salt – Enhances flavor; feel free to use sea salt if you prefer.
- Baking Powder – Helps cookies rise; can be replaced with baking soda if necessary.
- Unsalted Butter – Adds richness; consider vegan butter for a dairy-free alternative.
- Brown Sugar – Moisture and sweetness come from this; white sugar can be used but may slightly alter the taste.
- Large Egg – Binds the ingredients together; for an egg-free version, swap with a flax egg.
- Pure Vanilla Extract – Adds depth of flavor; imitation vanilla will work in a pinch but may be less intense.
- Edible Confetti/Sprinkles – Adds a fun visual touch; substitute with chocolate chips for a tasty twist.
For the Frosting Dip
- Heavy Cream – Creates a rich and creamy dip; half-and-half can be a lighter substitute if desired.
- Cream Cheese – Acts as the base for the dip; vegan cream cheese is a great dairy-free option.
- Powdered Sugar – Sweetens the dip perfectly; granulated sugar can be used but will change the texture slightly.
Indulge in these Cookie Fries with Frosting Dip that turn a traditional dessert into a fun and delicious treat!
Step‑by‑Step Instructions for Cookie Fries with Frosting Dip
Step 1: Preheat the Oven
Begin by preheating your oven to 350°F (175°C). While the oven heats, line two baking sheets with parchment paper, ensuring that they are ready to accommodate your delightful Cookie Fries. This step is crucial for even baking and preventing sticking, so take a moment to prepare your equipment!
Step 2: Mix Dry Ingredients
In a medium bowl, whisk together 2 cups of flour, 2 tablespoons of cornstarch, 1 teaspoon of kosher salt, and 1 teaspoon of baking powder. This dry mixture will be the foundation of your Cookie Fries, helping them achieve a perfect crispy texture. Once combined, set the bowl aside and prepare for the next stage.
Step 3: Cream Butter and Sugar
In a large mixing bowl, use an electric mixer to beat 1 cup of unsalted butter and 1 cup of brown sugar together until the mixture is light and fluffy, which should take about 2 minutes. This creaming process incorporates air, helping create the soft interior of the cookies. Scrape down the sides of the bowl to ensure all ingredients are well combined.
Step 4: Incorporate Egg and Vanilla
Add 1 large egg and 2 teaspoons of pure vanilla extract to the creamed butter-sugar mixture, and mix until fully incorporated, approximately 30 seconds. The egg acts as a binder, helping the dough come together beautifully. Make sure to mix until there are no visible streaks of egg or vanilla left, resulting in a smooth batter.
Step 5: Combine Wet and Dry Ingredients
Gradually add the dry ingredient mixture to the wet ingredients, mixing until just combined. Be careful not to overmix, as this can lead to puffy cookies. Once combined, gently fold in ½ cup of edible confetti or sprinkles for a fun visual element. The batter should be thick and slightly sticky.
Step 6: Chill the Dough
Cover the cookie dough with plastic wrap and place it in the refrigerator to chill for 30 minutes. Chilling helps the dough firm up, making it easier to roll out and cut into the perfect fry shapes later. Take this time to clean up your work area and enjoy the anticipation of your Cookie Fries!
Step 7: Roll Out the Dough
After chilling, remove the dough from the refrigerator and roll it out on a lightly floured surface to about 3/8 inch thickness. Use a rolling pin for an even layer. As you roll, you should see the dough transforming into a smooth surface, ideal for cutting into fries. Prepare to use a sharp knife for cutting.
Step 8: Cut into Fry Shapes
With a sharp knife or a pizza cutter, slice the rolled-out dough into fry shapes, approximately ½ inch by 4 inches. Place the cut cookie fries on the prepared baking sheets, arranging them with a little space between each fry. This spacing allows for even baking, ensuring your Cookie Fries turn out perfectly.
Step 9: Freeze Cookies
Once cut, place the baking sheets in the freezer for 20 minutes. This step helps the Cookie Fries keep their shape during baking and enhances the crispiness of the edges. While you wait, take a moment to gather ingredients for your frosting dip, making your prep seamless.
Step 10: Bake the Fries
After freezing, bake the cookie fries in the preheated oven for 10-12 minutes. Keep an eye on them; they should be set and light in color but still soft to the touch. Enjoy the aroma filling your kitchen as they bake, a tantalizing hint of the sweet treat to come.
Step 11: Prepare the Frosting Dip
While the fries are baking, whisk together ½ cup of heavy cream, 4 ounces of cream cheese, and 1 cup of powdered sugar in a mixing bowl until smooth and creamy. This rich frosting dip will elevate your Cookie Fries to new heights. The mixture should be thick yet spreadable, perfect for dunking.
Step 12: Serve Warm
Once baked, let the cookie fries cool for a few minutes on the baking sheets before transferring them to a serving plate. Serve your warm Cookie Fries alongside the creamy frosting dip, inviting everyone to indulge in this playful dessert. Enjoy the fun of dunking and savor every delightful bite!
Make Ahead Options
These Cookie Fries with Frosting Dip are perfect for busy home cooks looking to save time! You can prepare the dough and chill it up to 48 hours in advance. Simply follow the recipe up to the chilling step, then wrap the dough tightly in plastic wrap and refrigerate. You can also cut the fries and freeze them for up to 1 month; just arrange them on a baking sheet and freeze until solid before transferring to an airtight container. When ready to bake, there’s no need to thaw—just pop them directly into the oven and adjust baking time if necessary. This way, you can enjoy fresh and delicious cookie fries with minimal effort on your busy weeknight!
Expert Tips for Cookie Fries with Frosting Dip
-
Dough Consistency: Make sure your dough is thick enough to hold its shape but not too sticky. If it feels too wet, add a little more flour.
-
Chill Time Matters: Don’t skip chilling the dough! It not only helps in shaping but also contributes to that crispy exterior when baked.
-
Minimize Overbaking: Keep a close eye on your cookie fries towards the end of the baking time; they should remain soft and light in color for the perfect texture.
-
Sprinkle Variation: Feel free to experiment with different types of sprinkles or mix-ins. Chocolate chips or nuts can give your cookie fries a delightful twist!
-
Dipping Delight: Adjust frosting thickness by adding more cream for a runnier dip or more powdered sugar for a thicker consistency—find your perfect balance!
-
Storage Savvy: If you have leftovers, store them in an airtight container to maintain their freshness; however, they are best enjoyed warm right out of the oven alongside your frosting dip.
What to Serve with Cookie Fries with Frosting Dip
Dive into the world of flavor pairings that will turn your dessert into a delightful feast.
-
Fresh Fruit Platter: A mix of vibrant berries and juicy citrus can balance the sweetness, providing a refreshing contrast. The tartness of the fruit complements the cookie fries perfectly!
-
Chocolate Dipping Sauce: For chocolate lovers, a silky chocolate dip adds just the right amount of indulgence, enhancing the dipping experience. It’s rich, creamy, and oh-so tasty!
-
Whipped Cream: Light and airy, freshly whipped cream offers a lovely textural contrast to the doughy fries, making each bite heavenly. Swirl in a flavor, like vanilla or almond, for an extra touch!
-
Nutty Cookies: Serve alongside mixed nut cookies for an unexpected crunch. The nuttiness pairs nicely with the sweetness of the frosting dip, offering a delightful variety of textures.
-
Coffee or Hot Chocolate: These warm beverages are not only comforting but enhance the sweet experience of cookie fries. The bold flavors blend perfectly with the sweetness of your dessert!
-
Caramel Sauce: Drizzling warm caramel over your cookie fries adds a splendidly rich flavor, creating a decadent twist on your already playful dessert.
-
Ice Cream Scoops: For a whimsical combination, serve the cookie fries alongside a scoop of your favorite ice cream. The melting ice cream against warm fries is absolutely scrumptious!
-
Sparkling Lemonade: A fizzy, tart lemonade can refresh your palate after each sweet bite, creating a harmonious balance of flavors and textures. It adds a fun, celebratory feel to your dessert table.
Cookie Fries with Frosting Dip Variations
Feel free to make these delightful cookie fries your own through a variety of tasty twists and swaps!
-
Chocolate Twist: Add ¼ cup of cocoa powder to the dry ingredients for a rich, chocolatey cookie fry that pairs perfectly with the frosting dip.
-
Nutty Addition: Toss in chopped nuts such as pecans or walnuts to the dough for added crunch and flavor in each bite. Don’t shy away from experimenting; nutty textures can elevate your indulgent treat!
-
Flavor Extract Substitution: Swap pure vanilla extract for almond or hazelnut extract to bring a unique flavor profile to your cookie fries. This simple change can bring a surprising twist that transports you elsewhere with every bite.
-
Fruity Delight: Incorporate fresh zest (like lemon or orange) into the dough for a refreshing citrusy note. The brightness of citrus adds a lightness to your cookies that’s simply irresistible.
-
Custom Dips: Instead of the classic frosting dip, try a silky chocolate ganache or butterscotch sauce to add layers of flavor. Dipping is the fun part, so don’t hesitate to get creative!
-
Spicy Kick: For those who love a little heat, add a pinch of cayenne pepper or chili powder to the dough for a spicy surprise. It’s a bold twist that brings an unexpected depth to the sweetness!
-
Colorful Sprinkles: Change up the sprinkle game by using themed or flavored sprinkles—think chocolate sprinkles for an added hint of cocoa or seasonal colors for festive occasions. Your cookie fries will be as much fun to look at as they are to eat!
-
Caramel Drizzle: Top the cookie fries with a drizzle of caramel before serving to add another layer of sweet indulgence. The gooey texture with the crunch of the fries? Pure heaven!
Feel free to mix and match these suggestions to tune your cookie fries to your taste! And if you’re in the mood for more fun desserts, consider pairing these with Neapolitan Cookies Strawberry for a whimsical dessert spread or enjoy them alongside a colorful serving of Unicorn Dip Whimsical. Enjoy your delicious creations!
How to Store and Freeze Cookie Fries
Airtight Container: Store leftover cookie fries in an airtight container at room temperature for up to 3 days to keep them fresh and maintain that delightful texture.
Freezing Cookie Fries: For longer storage, freeze the cookie fries in a single layer on a baking sheet for 20 minutes, then transfer them to a zip-top bag or airtight container for up to 3 months.
Reheating Tips: To enjoy your frozen cookie fries, simply bake them directly from the freezer at 350°F (175°C) for about 5-7 minutes until warmed through, and serve with your frosting dip!
Dough Storage: If you want to prepare ahead, the uncooked dough can be chilled in the refrigerator for up to 2 days before rolling out and baking, ensuring easy access to delicious Cookie Fries anytime!
Cookie Fries with Frosting Dip Recipe FAQs
How can I choose the best ingredients for my Cookie Fries?
Absolutely! For the best flavor, use high-quality butter—preferably unsalted—so you can control the saltiness in your cookies. Also, make sure your flour is fresh. Check for any dark spots or a stale smell. Remember, the fresher your ingredients are, the tastier your Cookie Fries will be!
What’s the best way to store leftover Cookie Fries?
After you’ve enjoyed your delightful Cookie Fries, store any leftovers in an airtight container at room temperature for up to 3 days. This will keep them fresh and maintain their delightful textures. If you prefer, you can also refrigerate them, but they might lose a bit of crispiness.
Can I freeze Cookie Fries for later enjoyment?
Absolutely! To freeze your Cookie Fries, place them in a single layer on a baking sheet and freeze for about 20 minutes until solid. Then, transfer them to a zip-top bag or airtight container. They can be stored in the freezer for up to 3 months. When you’re ready to indulge, simply bake them straight from the freezer at 350°F (175°C) for about 5-7 minutes until warm and inviting.
What if my Cookie Fries are too soft or puffy?
Very! If your Cookie Fries turn out too soft, you may have accidentally overmixed the dough. To avoid this, combine your wet and dry ingredients just until incorporated. If they’re puffy instead of crispy, ensure you chilling the dough was done properly. Not chilling enough will cause them to spread too much during baking.
Are there any dietary considerations with Cookie Fries?
Definitely! If you’re preparing these Cookie Fries for someone with dietary restrictions, consider using vegan butter and vegan cream cheese for a dairy-free version. You can also make them egg-free by substituting the egg with a flax egg—just mix 1 tablespoon of ground flaxseed with 2.5 tablespoons of water and let it sit for a few minutes until it thickens. Always check for any allergens in your sprinkles or dips used!
Cookie Fries with Frosting Dip
Ingredients
Equipment
Method
- Preheat your oven to 350°F (175°C) and line two baking sheets with parchment paper.
- In a medium bowl, whisk together 2 cups of flour, 2 tablespoons of cornstarch, 1 teaspoon of kosher salt, and 1 teaspoon of baking powder.
- In a large mixing bowl, use an electric mixer to beat 1 cup of unsalted butter and 1 cup of brown sugar until light and fluffy, about 2 minutes.
- Add 1 large egg and 2 teaspoons of pure vanilla extract to the creamed mixture and mix until fully incorporated.
- Gradually add the dry ingredient mixture to the wet ingredients, mixing until just combined, and fold in ½ cup of edible confetti.
- Cover the dough with plastic wrap and chill in the refrigerator for 30 minutes.
- Roll out the chilled dough on a lightly floured surface to about 3/8 inch thickness.
- Cut the dough into fry shapes, approximately ½ inch by 4 inches, and place on the prepared baking sheets.
- Freeze the cookie fries for 20 minutes to help them keep their shape while baking.
- Bake the cookie fries for 10-12 minutes until set and light in color.
- While baking, whisk together ½ cup of heavy cream, 4 ounces of cream cheese, and 1 cup of powdered sugar until smooth.
- Let the cookie fries cool for a few minutes before serving with the frosting dip.
Leave a Reply