
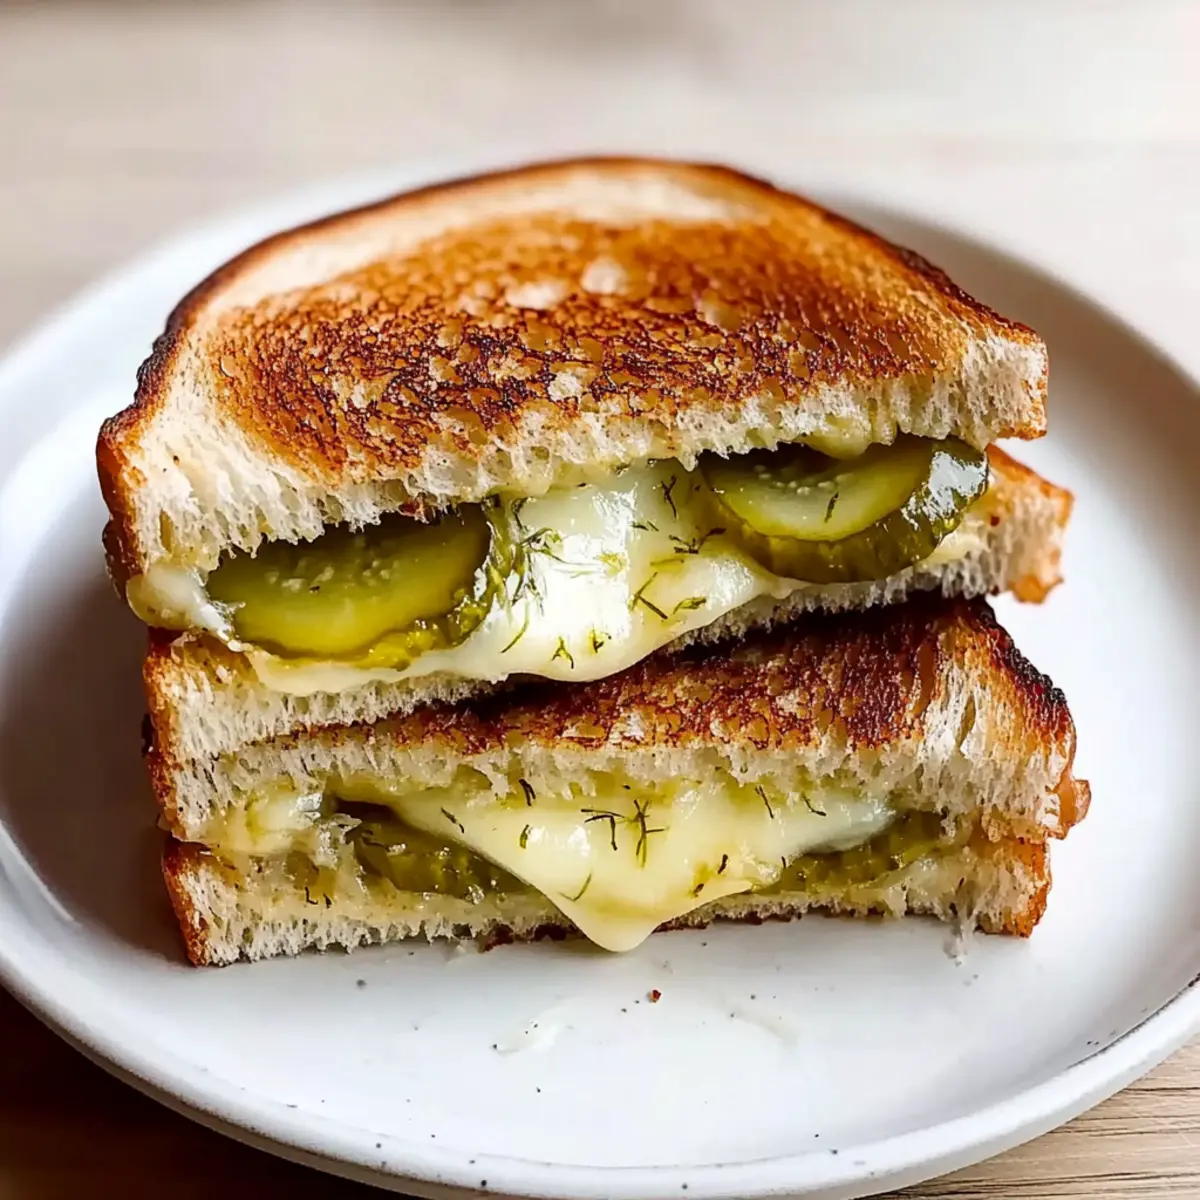
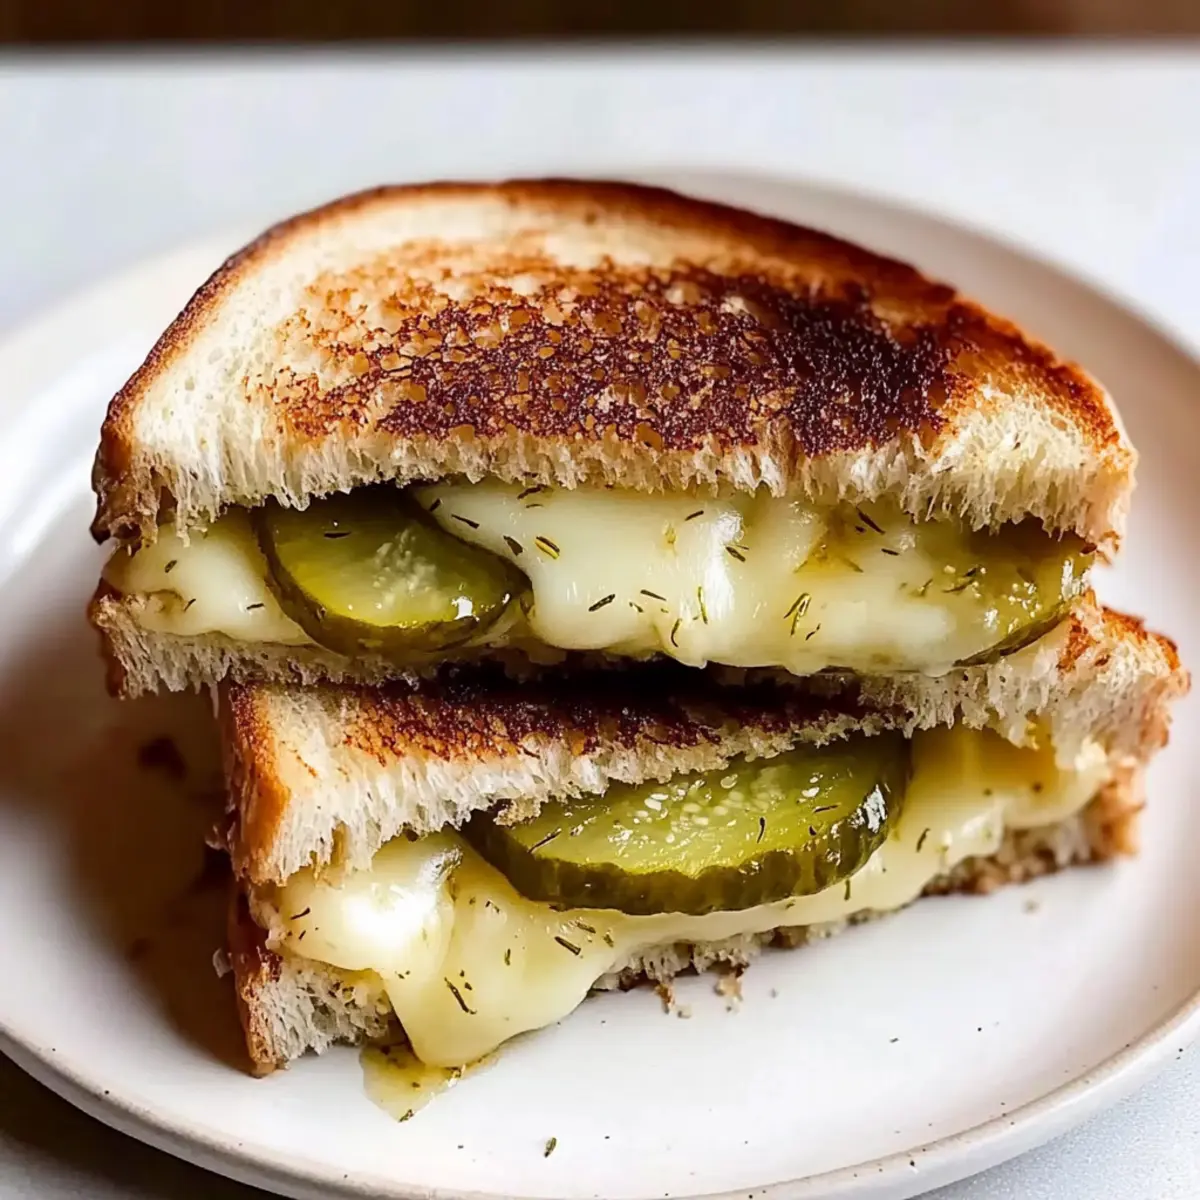
As I stood in my kitchen, craving a little comfort with an unexpected twist, my eyes landed on the jar of dill pickles sitting on the shelf. That’s when it hit me: a Crispy Dill Pickle Grilled Cheese was the perfect solution! This quick and easy recipe is a delightful fusion of familiar flavors with a zesty kick, combining the gooey goodness of melted cheese and the satisfying crunch of crispy pickles. Not only is this sandwich a crowd-pleaser that brings smiles to the dinner table, but it’s also an effortless way to elevate a classic dish when you’re short on time. With just a few ingredients and minimal prep, you can whip up a savory treat that feels indulgent yet completely approachable. Curious about how to make this mouthwatering masterpiece? Let’s dive in and put a tangy spin on your next grilled cheese!
Why Is This Grilled Cheese Special?
Crispy Delight: Each bite delivers a crunchy outer layer while the inside oozes with melted goodness.
Tangy Twist: The dill pickles add an unexpected zing that elevates this classic sandwich to new heights.
Quick & Easy: Perfect for busy weeknights, this recipe comes together in mere minutes without sacrificing flavor.
Crowd-Pleaser: Ideal for both kids and adults, it’s a sure-fire hit at any meal, just like my favorite Cottage Cheese Tots or Cranberry Cream Cheese bites.
Versatile Pairing: Serve it with warm tomato soup or a fresh salad for a complete and satisfying meal!
Crispy Dill Pickle Grilled Cheese Ingredients
For the Sandwich
- Sourdough Bread – Provides a tangy base that complements the other flavors; substitute with thick-cut white or whole wheat if preferred.
- Dill Havarti Cheese – Melts beautifully, enhancing creaminess; feel free to swap it with cheddar for a different flavor profile.
- Dill Pickles – Adds a tangy crunch; either sliced or chopped will work, but remember to pat pickles dry to avoid sogginess.
- Butter – Creates a golden, crispy exterior; use generously for the best texture in your Crispy Dill Pickle Grilled Cheese.
Optional Add-ins
- Dill Pickle-Flavored Potato Chips – For an extra crunch inside the sandwich; they provide a delightful surprise with every bite.
- Cooked Bacon – Adds a savory kick for those who want to elevate their grilled cheese experience.
Step‑by‑Step Instructions for Crispy Dill Pickle Grilled Cheese
Step 1: Prep the Ingredients
Start by slicing two pieces of sourdough bread, each about 1/2-inch thick. As you chop the dill pickles into bite-sized pieces, take a moment to pat them dry with paper towels to prevent sogginess later. This step is crucial for ensuring your Crispy Dill Pickle Grilled Cheese has that perfect crunchy texture!
Step 2: Assemble the Sandwich
Next, slice the dill havarti cheese into 1/4-inch thick slabs, giving you those luscious melty layers. Lay one slice of bread down and stack half the cheese on it. Sprinkle the chopped pickles evenly over the cheese, then add the remaining cheese on top before placing the other slice of bread to complete your sandwich, making sure everything is nicely contained.
Step 3: Butter the Bread
Generously butter the outer sides of both slices of the sandwich with about 1 tablespoon of butter for each side. This will create a beautifully golden, crispy exterior as your sandwich cooks. Make sure the butter is evenly spread to maximize the crunch factor of your Crispy Dill Pickle Grilled Cheese.
Step 4: Heat the Skillet
Preheat a skillet over medium-low heat—this is the key to achieving a perfectly cooked grilled cheese without burning the bread. Once the skillet is ready, carefully place your sandwich in the pan, ensuring it makes good contact for even cooking.
Step 5: Cook the First Side
Allow the sandwich to cook for about 4-5 minutes, checking after 3 minutes for a golden-brown crust. You want the bread to be crispy and toasted, while the cheese starts to melt deliciously. If you see the bread beginning to brown nicely, it’s time to flip it.
Step 6: Cook the Other Side
Using a spatula, gently flip the sandwich over to cook the other side, allowing it to sizzle for an additional 3-4 minutes. Keep an eye on it so the bread remains golden and crisp while the cheese melts to ooey-gooey perfection.
Step 7: Add the Surprise Crunch
Once the sandwich is perfectly cooked, take it off the heat and open it slightly. Sneak in some dill pickle-flavored potato chips for an extra crunchy surprise that elevates your Crispy Dill Pickle Grilled Cheese to an entirely new level of delight!
Step 8: Slice and Serve
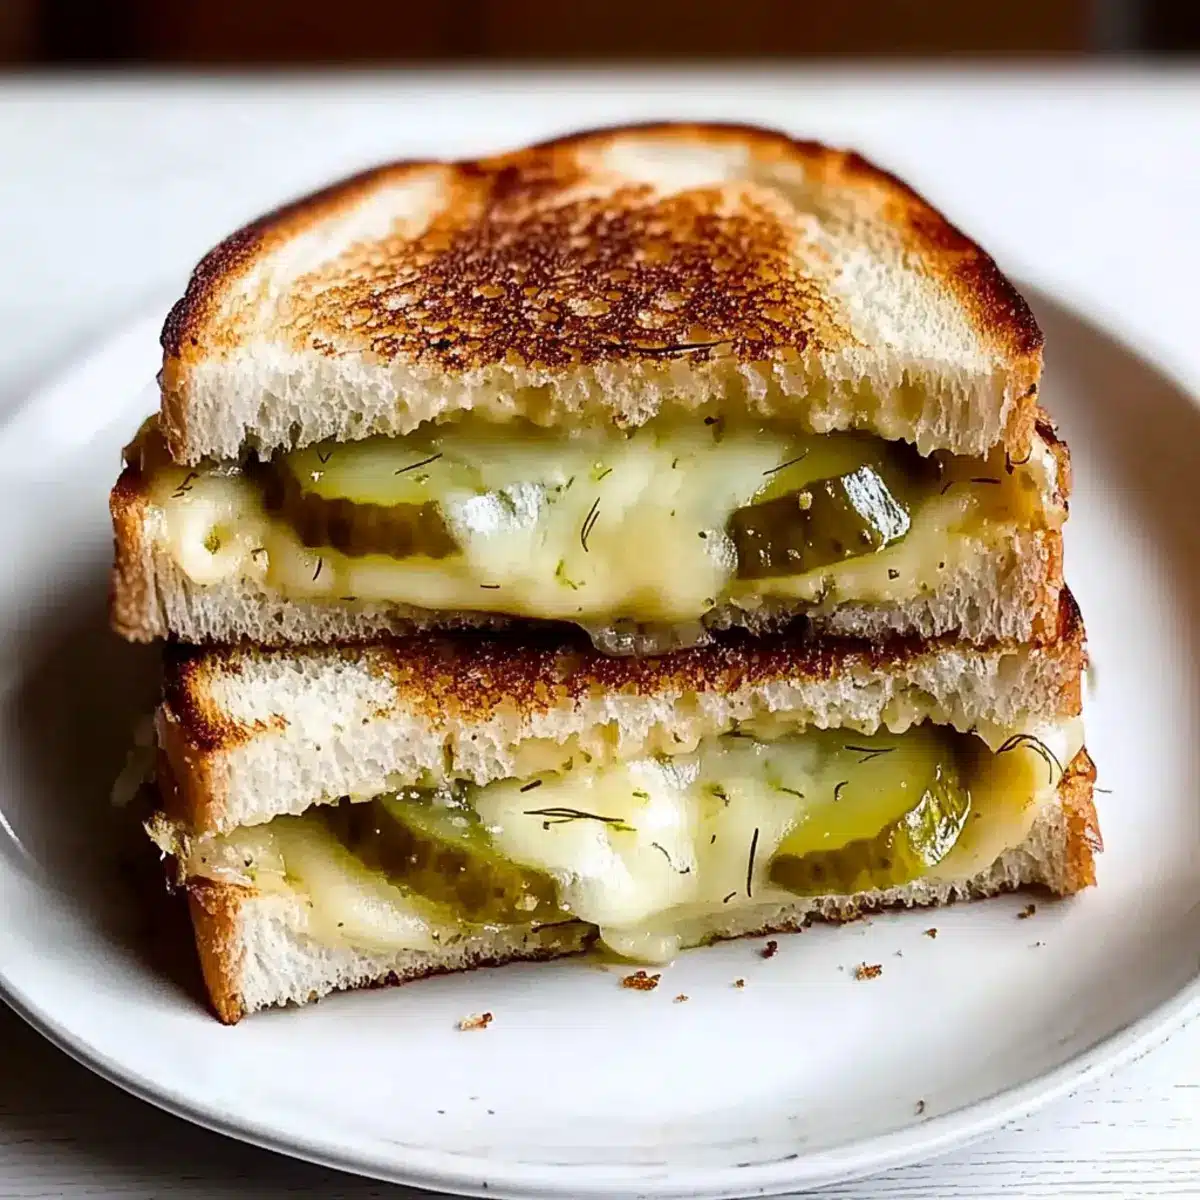
Finally, use a sharp knife to slice the sandwich diagonally into two halves. This not only makes it easier to eat but also showcases that melty cheese. Serve your delightful creation warm, alongside a bowl of tomato soup or salad, to enjoy this comforting meal!

Crispy Dill Pickle Grilled Cheese Variations
Feel free to explore exciting twists and substitutions to make this recipe your own!
- Sweet Pickles: Swap dill pickles for bread and butter pickles for a sweeter, more mellow flavor profile.
- Bacon Lovers: Adding crispy bacon elevates the savory notes and adds a delicious crunch alongside that gooey cheese.
- Cheesy Fusion: Experiment with different cheeses, like sharp cheddar or zesty pepper jack, to create a unique flavor experience.
- Spicy Kick: Add sliced jalapeños or a dash of hot sauce to your sandwich for an exciting spicy twist.
- Herbed Up: Mix in fresh herbs like dill or chives to enhance the earthy flavors and brighten up each bite!
- Chips Inside: Consider adding a layer of potato chips for that extra crunch, just like I do in my Cranberry Cream Cheese bites!
- Gluten-Free: Use gluten-free bread to ensure everyone can enjoy this crispy delight, making it family-friendly regardless of dietary needs.
- Vegan Version: Try dairy-free cheese alternatives and use vegan butter for a plant-based twist on this classic comfort food dish.
Let your taste buds guide you as you get creative in the kitchen!
How to Store and Freeze Crispy Dill Pickle Grilled Cheese
- Fridge: Store leftover sandwiches wrapped in foil or in an airtight container for up to 2 days. This keeps them fresh while preventing sogginess.
- Freezer: For longer storage, freeze cooked sandwiches individually wrapped in plastic wrap and then foil for up to 1 month. This way, your Crispy Dill Pickle Grilled Cheese remains delicious!
- Reheating: Reheat sandwiches directly from the fridge or freezer in a skillet over medium heat for 5-7 minutes, flipping halfway through. This restores the crispiness while warming the cheese.
- Make-Ahead Tips: Pre-chop pickles and shred cheese the night before; just remember to keep the pickles dry to ensure a delightful crunch when assembled.
Expert Tips for Crispy Dill Pickle Grilled Cheese
Pat Pickles Dry: Avoid sogginess by ensuring your dill pickles are thoroughly patted dry before adding them to the sandwich.
Medium-Low Heat: Cooking on medium-low heat ensures that the bread gets golden without burning before the cheese melts.
Generous Buttering: Don’t skimp on the butter! Generous amounts on the exterior lead to the crispiest, most satisfying finish for your Crispy Dill Pickle Grilled Cheese.
Use a Spatula: While cooking, gently press down with a spatula to meld the sandwich together for that perfect melted consistency.
Experiment with Cheeses: Feel free to mix different cheeses like cheddar or pepper jack for unique flavor combinations in your grilled cheese.
What to Serve with Crispy Dill Pickle Grilled Cheese
Elevate your mealtime experience with delightful sides that perfectly complement this tangy and gooey creation!
-
Tomato Soup: A classic duo, the warm richness of tomato soup balances the crispy sandwich beautifully, enhancing those comforting flavors.
-
Crispy Fries: Golden, crunchy fries provide a satisfying contrast to the melty goodness of the sandwich. Dip them in mayo or ketchup for extra zing!
-
Fresh Side Salad: A light, crisp salad with vinaigrette adds a refreshing quality, cutting through the richness of the grilled cheese while adding a healthy touch.
-
Dill Pickle Chips: Intensify the pickle flavor with some crunchy dill pickle chips on the side; they are a simple but flavorful addition!
-
Potato Wedges: Seasoned potato wedges deliver a hearty, savory touch that pairs well with the sandwich’s gooey cheese and pickled crunch.
-
Iced Lemonade: This bright, zesty drink lends a refreshing finish, complementing savory flavors with its crisp sweetness. Perfect for hot days!
Make Ahead Options
These Crispy Dill Pickle Grilled Cheese sandwiches are perfect candidates for meal prep, saving you precious time on busy weeknights! You can pre-slice the sourdough bread and chop the dill pickles up to 24 hours in advance, ensuring that you pat the pickles dry to maintain their crunch. Additionally, slice the dill havarti cheese and keep it in an airtight container in the refrigerator for up to 3 days. When it’s time to cook, simply assemble your sandwich and butter the outside as instructed. Heat in a skillet until golden and melty, and you’ll have a delicious, satisfying meal that feels fresh and indulgent!
Crispy Dill Pickle Grilled Cheese Recipe FAQs
How do I choose the right dill pickles for this sandwich?
Absolutely! The crunchier and more flavorful the dill pickles, the better the sandwich. Look for pickles that are bright in color and firm to the touch, avoiding any that have dark spots or seem mushy. If you have options, consider garlic dill pickles for an extra burst of flavor!
What’s the best way to store leftovers?
Store your leftover Crispy Dill Pickle Grilled Cheese in an airtight container or wrapped in foil in the fridge for up to 2 days. If you want to keep that crispy texture, avoid stacking them on top of each other. Just reheat them in a skillet to restore their crunch!
Can I freeze the sandwich?
Yes, you can freeze the Crispy Dill Pickle Grilled Cheese! Wrap each sandwich individually in plastic wrap, then in foil, and place them in the freezer for up to 1 month. To reheat, let them thaw in the fridge overnight, then warm them on a skillet over medium heat for about 5-7 minutes, flipping halfway through to ensure even warmth and crispiness.
What if my sandwich isn’t getting crispy enough?
If you’re not getting that desired crispiness, check your cooking temperature. Ensure you’re using medium-low heat. If the bread is darkening but the cheese hasn’t melted, lower the temperature further and cook a bit longer, pressing gently with a spatula to help meld everything together.
Are there any dietary considerations I should keep in mind?
Certainly! This recipe contains dairy from the cheese and butter, which may not be suitable for those with lactose intolerance. For a dairy-free version, consider using plant-based butter and vegan cheese alternatives, keeping the same layering technique for delicious results.
Crispy Dill Pickle Grilled Cheese: Your New Favorite Comfort Food
Ingredients
Equipment
Method
- Start by slicing two pieces of sourdough bread, each about 1/2-inch thick. Pat the chopped dill pickles dry with paper towels.
- Slice the dill havarti cheese into 1/4-inch thick slabs. Lay one slice of bread down and stack half the cheese on it. Add the chopped pickles, then the remaining cheese, and top with the second slice of bread.
- Generously butter the outer sides of both slices of the sandwich with about 1 tablespoon of butter for each side.
- Preheat a skillet over medium-low heat. Place the sandwich in the pan, ensuring it makes good contact for even cooking.
- Cook for about 4-5 minutes, checking after 3 minutes for a golden-brown crust. Flip when the bread is crispy.
- Flip the sandwich gently and cook the other side for an additional 3-4 minutes until golden and cheese is melted.
- Once cooked, open the sandwich slightly and sneak in some dill pickle-flavored potato chips.
- Slice the sandwich diagonally into two halves and serve warm with tomato soup or salad.
Leave a Reply