
“Do you ever feel the urge to unleash your inner candy wizard?” That’s how I felt the first time I made this delightful Magic Candy Recipe. It’s a whimsical treat that adds a pop of color and crunch to any occasion, whether you’re brightening up a gloomy day or bringing show-stopping sweets to a gathering. What I love most about this candy is how effortless it is—using just a few pantry staples, you can create a masterpiece without any special tools. Plus, the customization options are endless! Want a fruity explosion of flavors in vibrant colors? Go for it! Or, keep it simple and elegant with a classic vanilla twist. The best part? It’s a budget-friendly, gluten-free project that’s fun for both kids and adults. Ready to join me on this sweet adventure? Let’s dive into the enchanting world of homemade Magic Candy and create something truly magical together!
Why Make Magic Candy Today?
Ease of Creation: This recipe is so simple that anyone can become a candy-making pro, regardless of experience!
Customizable Flavors: Whether you’re a fan of fruity bursts or classic vanilla, you can personalize your Magic Candy with delightful flavor extracts.
Bright and Fun: The vibrant colors make these candies visually stunning, perfect for parties, festive occasions, or a cheering surprise on a dull day.
Cost-Effective: With just a handful of pantry staples and no pricey gadgets, you can whip up this budget-friendly treat that satisfies your sweet tooth without breaking the bank.
Perfect for All Ages: Kids will love the fun crunch and colors, while adults can appreciate the creative aspect of making custom sweets at home.
And if you’re interested in more delightful homemade treats, don’t forget to check out my recipe for Butterbeer Macarons Sweet or bring a refreshing twist to your drinks with Dirty Strawberry Soda!
Magic Candy Recipe Ingredients
For the Candy Base
• Granulated Sugar – The primary sweetener that provides essential structure; no direct substitutions recommended.
• Corn Syrup – Keeps the candy smooth and prevents crystallization; you can substitute with light liquid glucose if unavailable.
• Water – Helps dissolve the sugar before boiling; stick to the specified amount for best results.
For Flavoring and Color
• Flavor Extract (e.g., vanilla, fruit) – Adds delightful flavor; feel free to use any of your favorite extracts for unique variations.
• Food Coloring – Provides vibrant colors; this is optional if you prefer a natural look or want to skip the dye altogether.
Optional Dusting
• Powdered Sugar – Helps prevent sticking once the candy is cooled; can be replaced with cornstarch if desired.
Now you’re all set to embark on your candy-making adventure with this engaging Magic Candy Recipe!
Step‑by‑Step Instructions for Magic Candy Recipe
Step 1: Prepare the Pan
Line a 9×13 baking dish with parchment paper, ensuring it extends over the edges for easy removal. Lightly spray the parchment with cooking spray to prevent sticking. This preparation sets the foundation for your Magic Candy, ensuring a smooth release once it’s fully cooled and hardened.
Step 2: Combine Ingredients
In a medium saucepan, combine granulated sugar, corn syrup, and water. Stir gently to mix the ingredients and dissolve the sugar. Place the saucepan over medium-high heat and let it come to a boil without stirring. Watch for bubbles forming, indicating that the mixture is heating up properly for the next steps.
Step 3: Boil the Mixture
Allow the sugar mixture to boil on medium-high heat for 15–20 minutes, monitoring it closely. You’re aiming for a temperature of 300°F, also known as the hard crack stage. The liquid will turn a lovely golden hue, and careful bubbling will signify that it’s getting close. Do not stir, as this can lead to unwanted crystallization.
Step 4: Testing for Doneness
To check the syrup without a thermometer, drop a small amount into a bowl of cold water. When ready, it should form a hard, snap-like texture. This is your signal that the syrup has reached the perfect stage to create the delightful crunch in your Magic Candy.
Step 5: Add Flavor and Color
Remove the saucepan from the heat immediately. Carefully stir in your chosen flavor extract along with any food coloring, taking care as the mixture may steam up. This step transforms your candy into a colorful, aromatic creation and sets the stage for the fun final look of your Magic Candy.
Step 6: Pour and Cool
Quickly pour the hot candy mixture into your prepared baking dish, spreading it evenly with a spatula if needed. Allow the Magic Candy to cool at room temperature for about 45 minutes. During this time, it will solidify, forming beautiful glassy shards while your kitchen fills with its sweet aroma.
Step 7: Break Into Shards
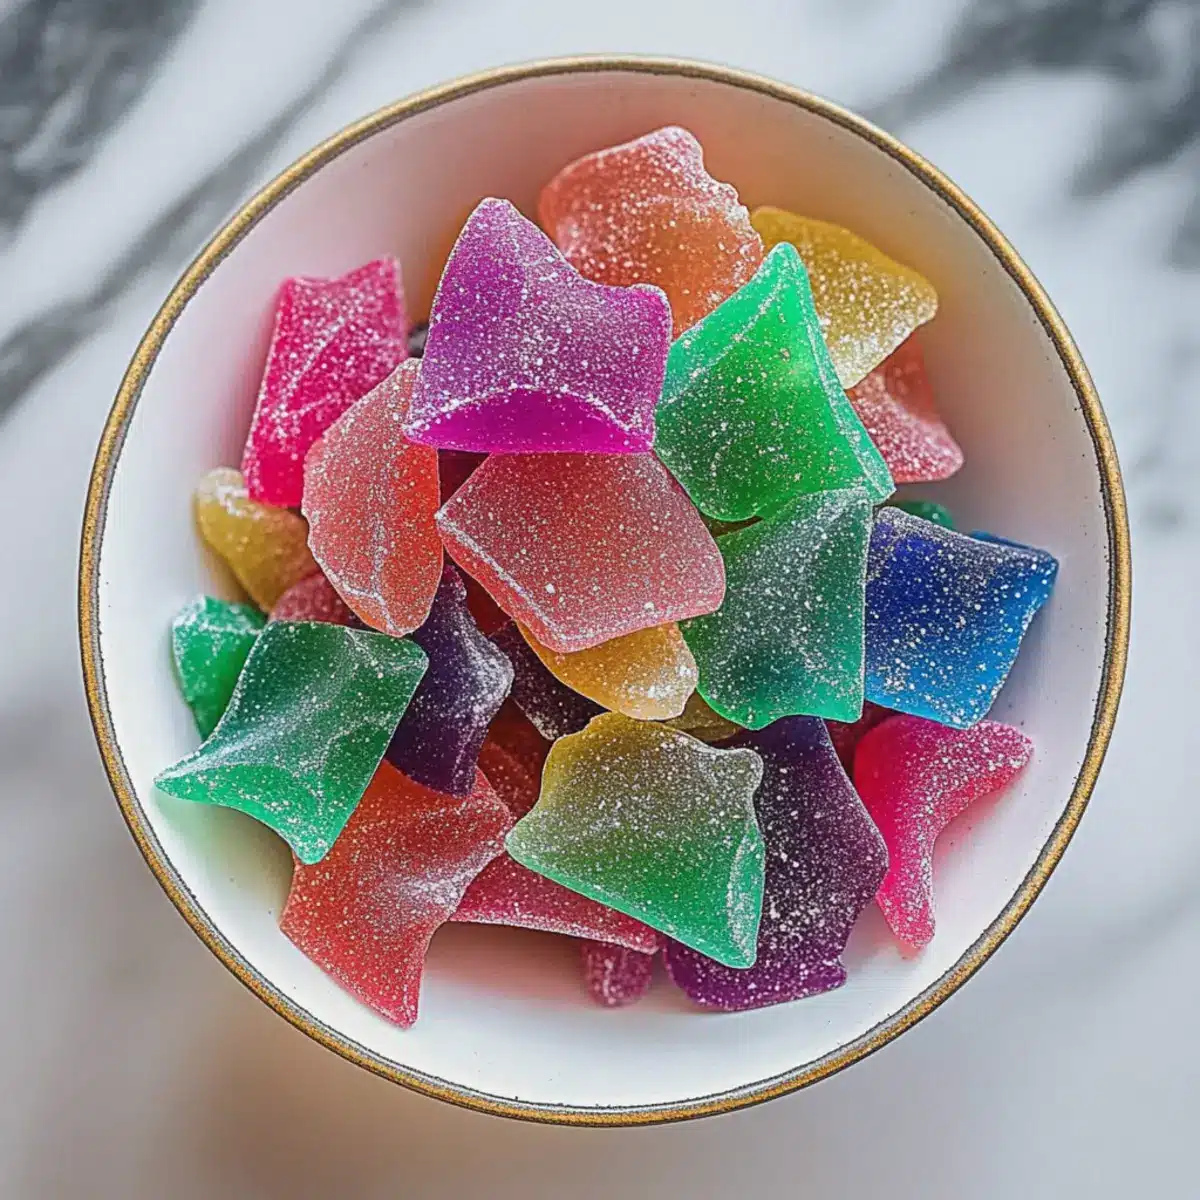
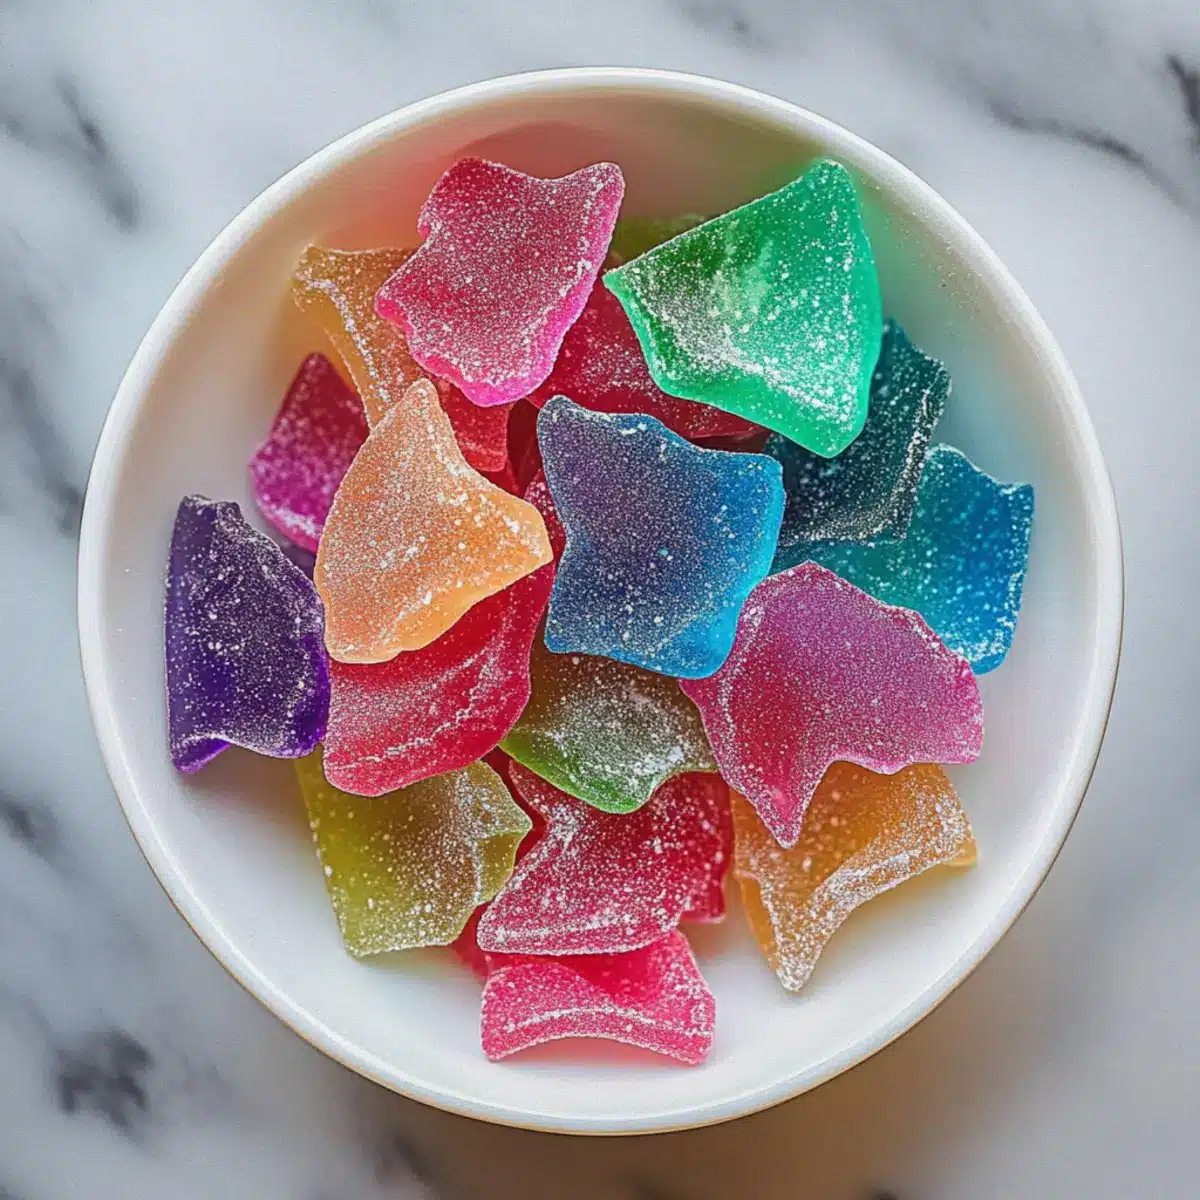
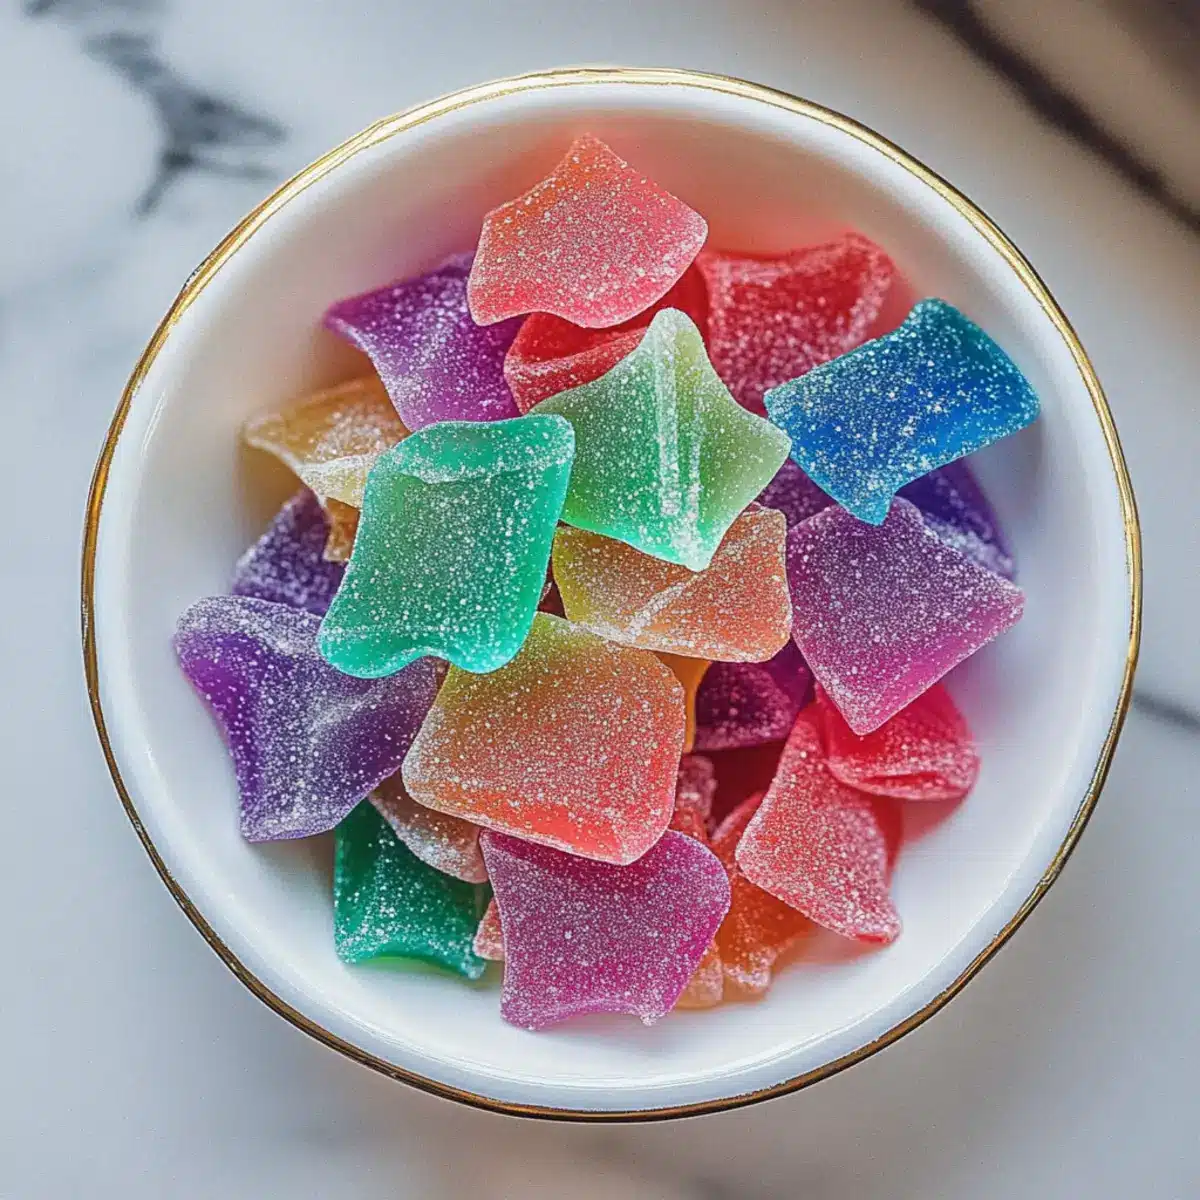
Once cooled, carefully lift the candy out of the dish using the edges of the parchment paper. Place it on a cutting board and use a mallet or the back of a spoon to break the candy into shards of your desired size. The texture should be crunchy and satisfying, revealing the vibrant colors inside.
Step 8: Dust and Store
If desired, you can dust the candy shards with powdered sugar to prevent sticking. This makes it easier to handle and adds a nice touch. Finally, store your beautiful Magic Candy in an airtight container at room temperature for up to two weeks, ensuring you keep it fresh and ready to impress!
What to Serve with Magic Candy
Light up your gatherings with an enchanting blend of flavors and textures that perfectly complements this whimsical treat!
-
Sparkling Lemonade: This refreshing drink adds a bright citrusy note that balances the sweetness of the candy. Perfect for sunny days!
-
Chocolate Fondue: The creamy richness of melted chocolate makes a decadent dip for your Magic Candy shards, inviting a delightful contrast of flavors.
-
Fruit Salad: A colorful array of fresh fruits introduces a light and juicy component, enhancing the vibrant aesthetics and flavors of your candy.
-
Vanilla Ice Cream: The creamy, comforting texture of vanilla ice cream pairs beautifully with the crunch of Magic Candy, creating a delightful dessert experience.
-
Candied Popcorn: These crunchy, sweet morsels amplify the fun of your spread, combining delicious sugar crystals and popcorn for a nostalgic treat.
-
Herbal Tea: A soothing cup of chamomile or mint tea can refresh the palate, creating a soothing balance against the sugary crunch of the candy.
-
Chocolate Milk: This creamy, chocolatey drink brings a sweet familiarity that kids and adults alike will adore, enhancing the festive atmosphere.
Serve up these delightful pairings to create an unforgettable candy celebration!
Expert Tips for Magic Candy Recipe
-
Use Cold Water Test: This simple method determines the syrup’s readiness without a thermometer. Drop a small amount into cold water; it should snap when ready.
-
Avoid Stirring: While boiling the sugar mixture, do not stir. This can lead to crystallization, resulting in a cloudy and grainy texture.
-
Perfect Timing: Keep an eye on the temperature and color. The syrup should reach 300°F and turn golden for the best crunch in your Magic Candy.
-
Customize Wisely: Explore different flavor extracts for unique tastes, but start with small amounts to find your favorite balance before committing to larger batches.
-
Storage Secrets: Store your Magic Candy in an airtight container at room temperature without refrigeration. This keeps it fresh and prevents stickiness.
Magic Candy Recipe Variations
Looking to personalize your Magic Candy? Let your creativity run wild with these delightful twists!
-
Fruity Explosion: Add a mix of flavor extracts, like raspberry, lemon, or orange, for a burst of fruity fun.
-
Tangy Surprise: Dust your finished candy with citric acid for a zesty kick that contrasts with the sweetness.
-
Popping Candy: For an extra treat, mix in some popping candy just before pouring the syrup into the pan for an exciting fizz.
-
Chocolate Drizzle: Once cooled, drizzle some melted chocolate over the shards for a rich, decadent finish that complements the crunch.
-
Natural Colors: Skip the artificial colors and try using natural food colorings, like beet juice for red or turmeric for yellow, if you prefer an earthier hue.
-
Nutty Crunch: Fold in crushed nuts, like pistachios or almonds, while the mixture is still warm for a crunchy surprise in every bite.
-
Spiced Delight: Add a pinch of cinnamon or a drop of almond extract for a warm, cozy flavor that’s perfect for fall.
-
Lollipop Version: Pour the hot syrup into lollipop molds with sticks for fun and portable treats that kids will adore.
And don’t miss out on making other sweet delights! Try my enchanting Butterbeer Macarons Sweet or satisfy your thirst with a fizzy Dirty Strawberry Soda.
How to Store and Freeze Magic Candy
Room Temperature: Store your Magic Candy in an airtight container at room temperature for up to 2 weeks to maintain its crunchiness and flavor.
Avoid Refrigeration: Refrigerating the candy can lead to stickiness and alter its delightful crunch. Keep it in a cool, dry place instead.
Layering: If stacking layers of candy, place parchment or wax paper between them to prevent sticking and preserve their beautiful appearance.
Freezing: While not recommended for long-term storage, if necessary, you can freeze Magic Candy in a sealed freezer bag for up to 3 months. Thaw at room temperature before enjoying.
Make Ahead Options
These Magic Candy treats are perfect for meal prep and can save you precious time during busy weeks! You can make the candy up to 2 weeks in advance, allowing you to whip up batches ahead of any special occasion or simply to enjoy throughout the week. To prepare, follow the instructions until the candy is cooled and broken into shards, then store them in an airtight container at room temperature. Just be sure to place parchment or wax paper between layers to prevent sticking. When you’re ready to serve, simply dust with powdered sugar if desired, and enjoy your vibrant, crunchy treats that are just as delicious as when freshly made!
Magic Candy Recipe FAQs
How do I choose the right ripeness of ingredients?
Absolutely! For this Magic Candy Recipe, you don’t need overly ripe ingredients since sugar and corn syrup are the stars of the show. However, if you’re using flavor extracts, make sure they’re fresh and free from any strange odors or clumping. Fresh extracts have a more vibrant taste that will enhance your candy’s overall flavor.
What’s the best way to store Magic Candy?
I recommend storing your Magic Candy in an airtight container at room temperature, where it can stay fresh and delicious for up to 2 weeks. Avoid refrigerating the candy, as the moisture can lead to stickiness. For longer storage, layer the pieces with parchment paper so they don’t stick together!
Can I freeze Magic Candy? How?
Yes, you can freeze Magic Candy if needed! To do this, place the candy in a sealed freezer bag, making sure to remove as much air as possible to prevent freezer burn. It can be stored like this for up to 3 months. When you’re ready to enjoy, simply thaw the candy at room temperature—this helps preserve its lovely crunch.
What should I do if my candy crystallizes?
Very! If accidentally stirred while boiling or if the syrup cools down before reaching 300°F, your Magic Candy may crystallize, resulting in a gritty texture. If this happens, gently reheat the mixture on low heat, stirring just enough to dissolve the crystals. Keep a close eye on the temperature and remember: patience is key to achieving that perfect texture!
Can pets eat Magic Candy? Is it allergen-free?
It’s best to keep this sweet treat away from pets! Many ingredients in candy, such as sugar and corn syrup, can upset their digestive systems. Additionally, be aware of dietary considerations; this Magic Candy is gluten-free, but if you’re concerned about allergies, always check your flavor extracts for any specific allergens.
Can I make this recipe without food coloring?
Definitely! If you prefer a natural look or want to skip the dye, just leave out the food coloring in this Magic Candy Recipe. The candied pieces will still taste delightful and maintain that satisfying crunch without the bright, vivid colors. Happy candy-making!

Magic Candy Recipe: Fun, Colorful Treats You Can Customize
Ingredients
Equipment
Method
- Line a 9x13 baking dish with parchment paper, ensuring it extends over the edges for easy removal. Lightly spray the parchment with cooking spray to prevent sticking.
- In a medium saucepan, combine granulated sugar, corn syrup, and water. Stir gently to mix the ingredients and dissolve the sugar. Place the saucepan over medium-high heat and let it come to a boil without stirring.
- Allow the sugar mixture to boil on medium-high heat for 15–20 minutes, aiming for a temperature of 300°F. The mixture will turn a golden hue.
- To check the syrup without a thermometer, drop a small amount into a bowl of cold water. It should form a hard, snap-like texture when ready.
- Remove the saucepan from heat. Carefully stir in flavor extract and any food coloring.
- Quickly pour the hot candy mixture into the prepared baking dish, spreading it evenly. Allow to cool at room temperature for about 45 minutes.
- Once cooled, carefully lift the candy out using the edges of the parchment paper and break into shards of desired size.
- If desired, dust the candy shards with powdered sugar to prevent sticking and store in an airtight container.
Leave a Reply