
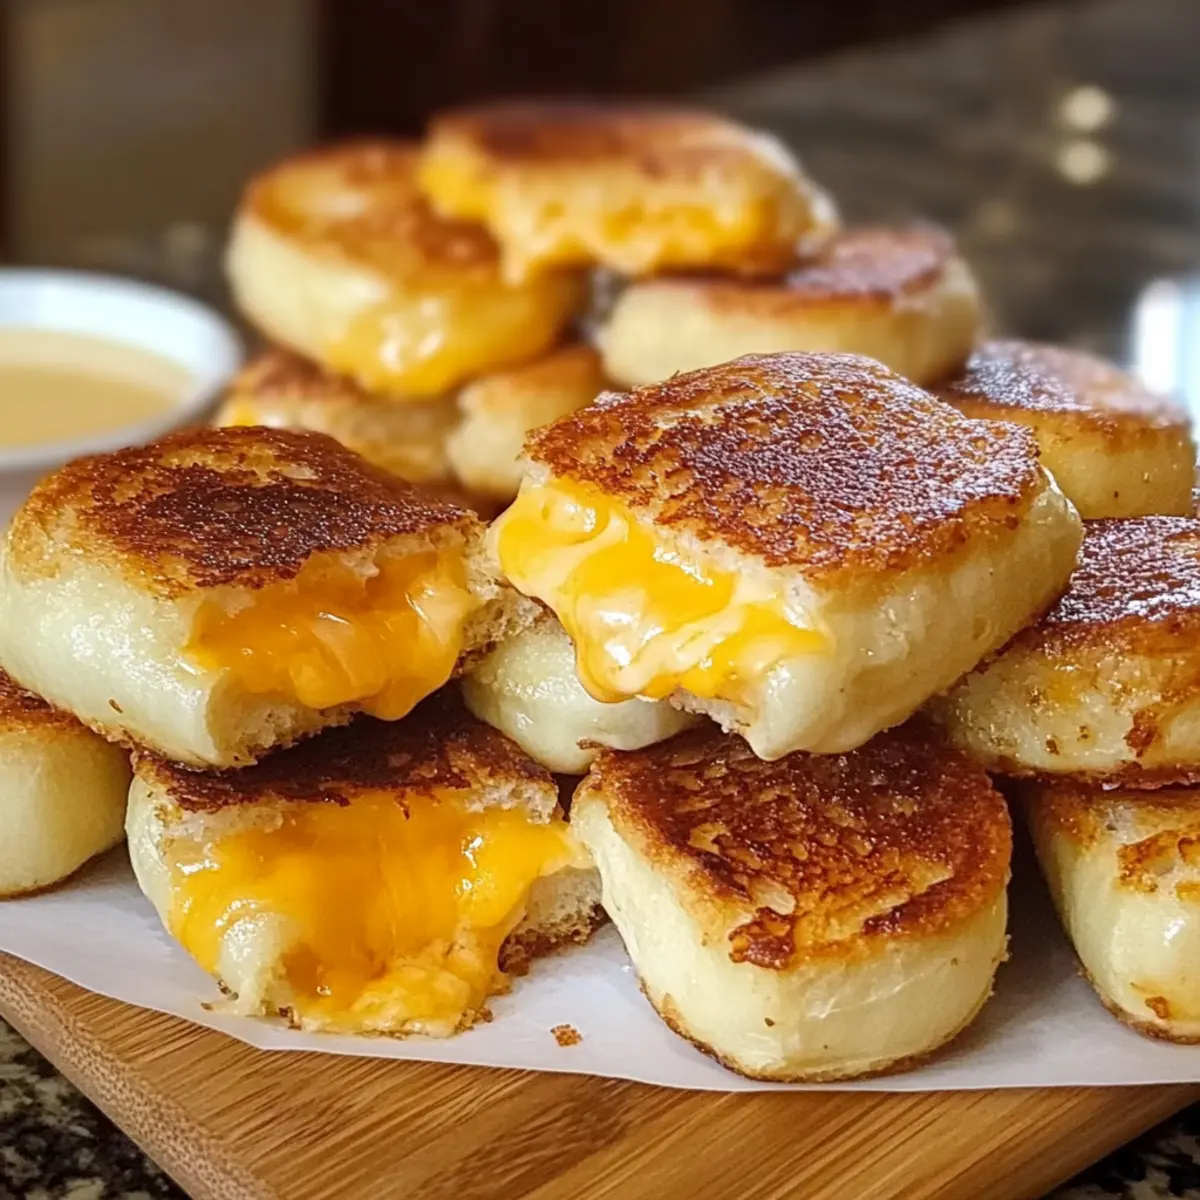
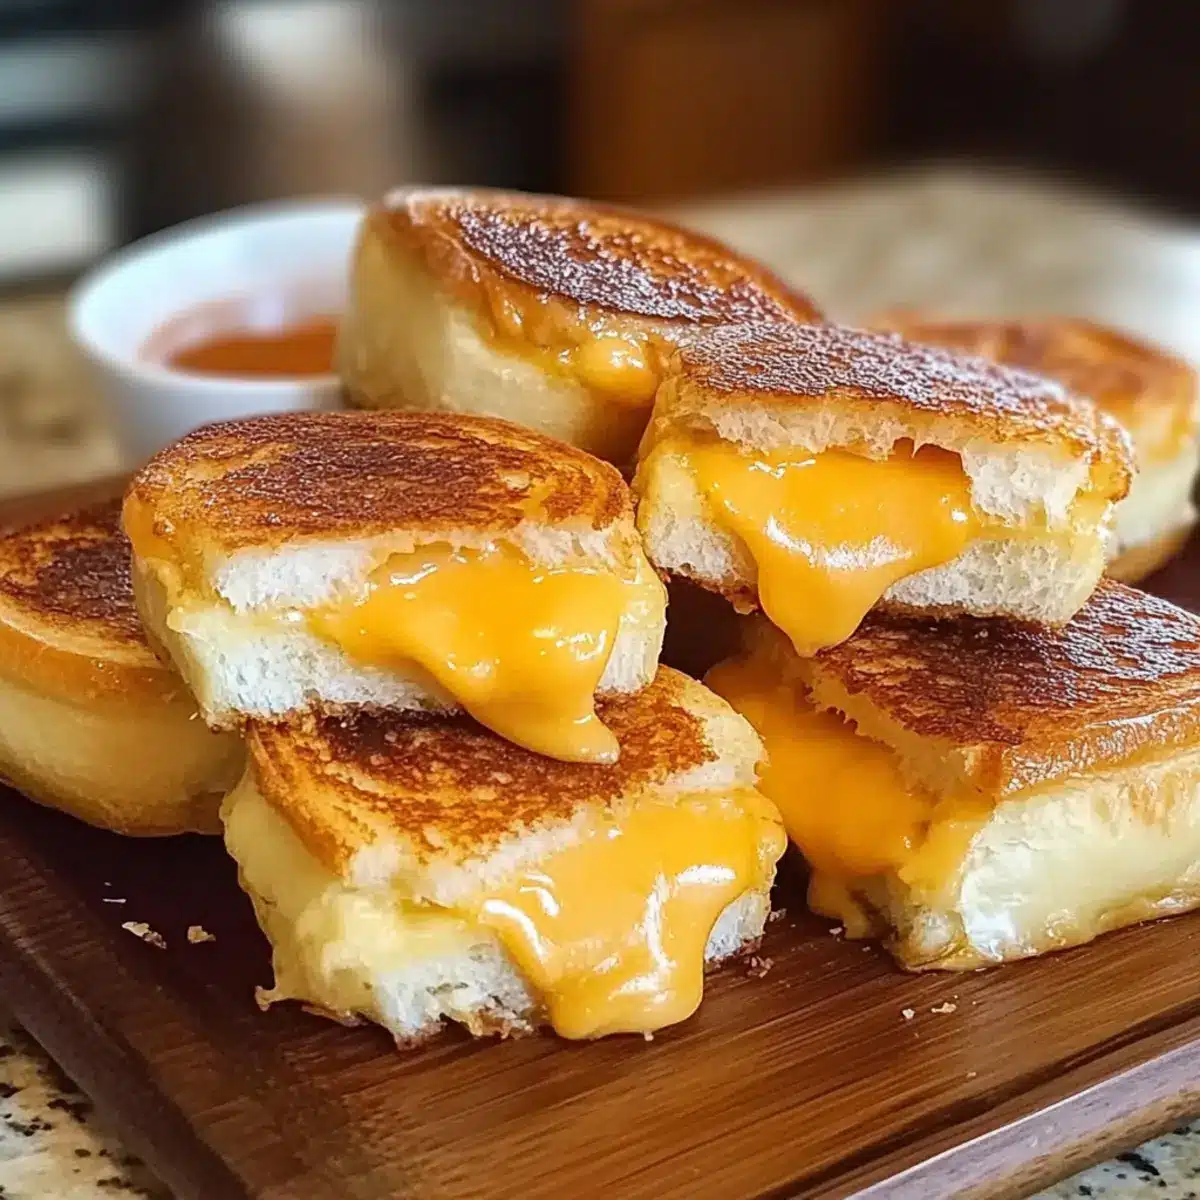
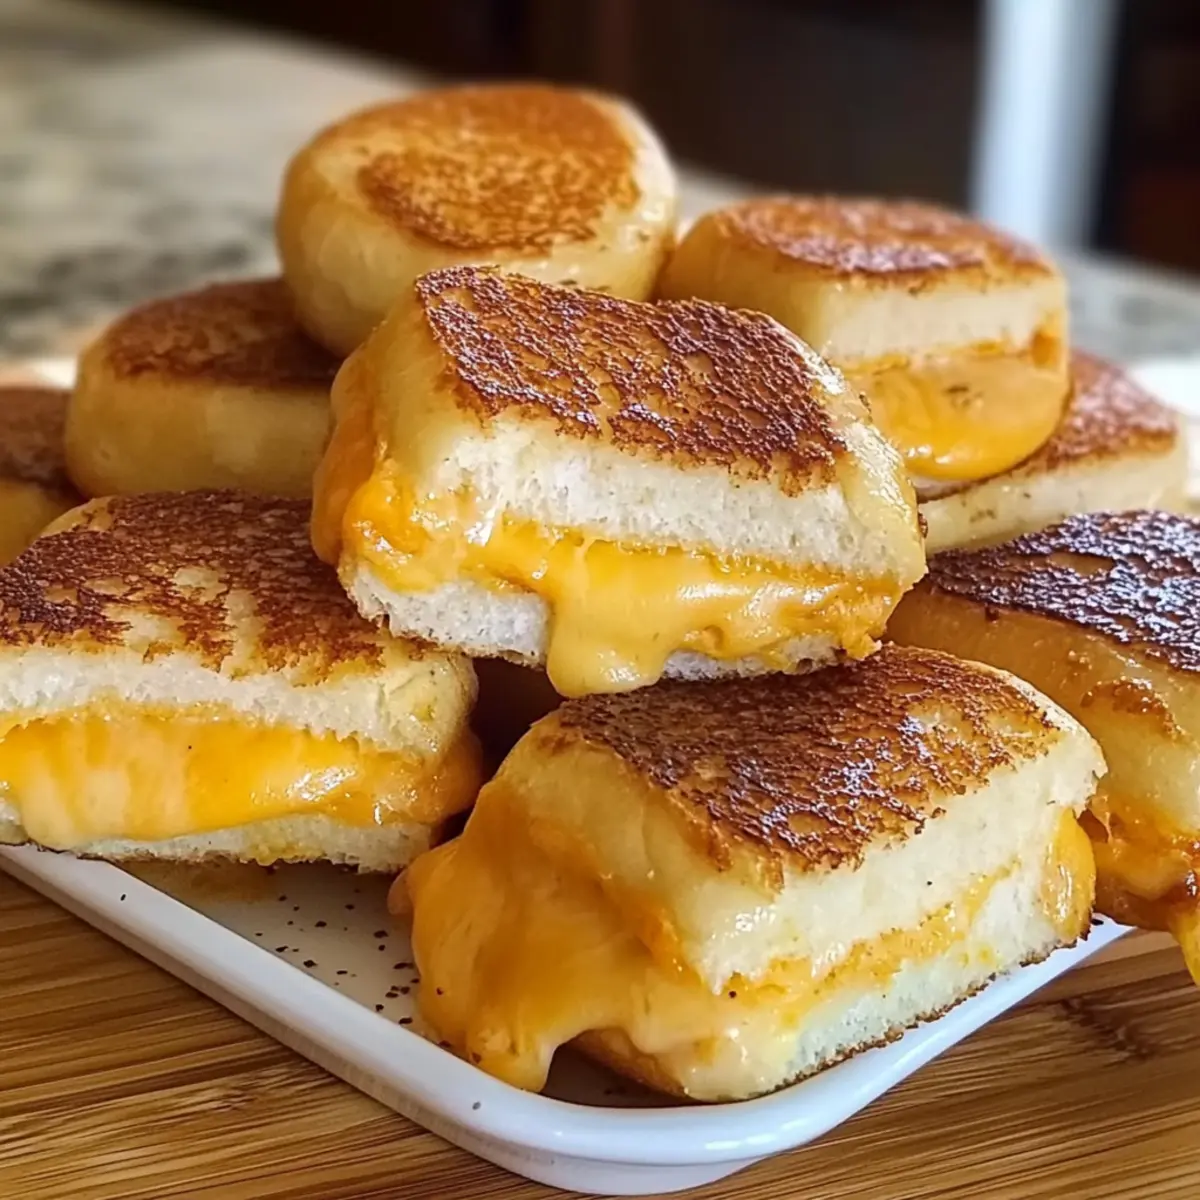
As I stood in my kitchen, the aroma of melted cheese wafted through the air, instantly bringing back memories of childhood platefuls of comfort food. That’s when I decided to whip up Mini Grilled Cheese Hawaiian Rolls. These delightful bites combine fluffy, sweet Hawaiian rolls with rich, gooey cheese, making them a perfect choice for any quick meal or snack time. Not only are they incredibly easy to prepare, but their customizable nature makes them ideal for the whole family—kids will adore them just as much as adults! Imagine everyone gathering around as the golden-brown rolls come out of the oven, begging to be devoured. Curious to see how you can create this cheesy treasure? Let’s dive into the recipe!

Why are Mini Grilled Cheese Hawaiian Rolls amazing?
Deliciously Cozy: Experience the warm gooeyness of melty cheese paired with sweet Hawaiian rolls for a comforting bite.
Quick and Easy: Minimal prep time means you can whip these up in no time, perfect for busy evenings or unexpected guests.
Customizable: Whether you prefer classic cheeses or adventurous fillings like grilled chicken, the options are endless!
Kid-Friendly Appeal: Even the pickiest eaters can’t resist these tasty bites—ideal for family snacks or lunchboxes.
Perfect for Sharing: Serve as a tasty appetizer at gatherings; these rolls are sure to be the star of the show! For another delightful cheese experience, check out my mouthwatering Cranberry Cream Cheese and Chocolate Cream Cheese recipes!
Mini Grilled Cheese Hawaiian Rolls Ingredients
Here’s everything you’ll need to create these scrumptious Mini Grilled Cheese Hawaiian Rolls!
For the Rolls
- Hawaiian Rolls – These sweet, soft rolls provide the perfect base and can be replaced with other slider buns if you’re in a pinch.
For the Cheese
- Cheddar Cheese – Offers a sharp, tangy flavor; great for traditional grilled cheese vibes.
- Mozzarella Cheese – Ideal for that ooey-gooey, melty texture that pulls apart beautifully.
- Swiss Cheese – Adds a nutty flavor that pairs perfectly with bacon.
- Provolone Cheese – A smooth, mild alternative; mix with others for complex flavors.
For the Butter Mixture
- Butter (Melted) – Achieves that crispy, golden crust; use unsalted for optimal seasoning control.
- Garlic Powder – Enhances the flavor of the butter; adjust the amount based on your preference.
- Onion Powder – Adds a subtle sweetness that pairs well with the rich cheese.
- Mixed Herbs – Fresh or dried herbs can elevate the flavor—experiment with your favorites!
Optional Add-ins
- Bacon (Turkey, Beef, Chicken) – For a savory crunch; feel free to swap based on dietary needs.
- Veggies (Spinach, Roasted Red Peppers) – Add nutrition and flavor for a colorful twist.
These Mini Grilled Cheese Hawaiian Rolls are not only delicious, but they’re also incredibly adaptable for whatever mood strikes you in the kitchen!
Step‑by‑Step Instructions for Mini Grilled Cheese Hawaiian Rolls
Step 1: Preheat the Oven
Begin by preheating your oven to 350°F (175°C). This ensures an even cooking temperature when preparing your delicious Mini Grilled Cheese Hawaiian Rolls. While the oven heats, gather your ingredients and equipment, including a baking tray lined with parchment paper or aluminum foil for easy cleanup.
Step 2: Prepare the Hawaiian Rolls
Slice the Hawaiian rolls horizontally as one continuous piece, making sure they remain attached. This step creates a delightful sandwich effect, allowing for the gooey cheese to melt beautifully within the rolls. Set the top half aside while you layer on the fillings.
Step 3: Add the Cheese and Optional Fillings
Generously layer your choice of cheese across the bottom half of the Hawaiian rolls. If you’re adding bacon or other fillings, evenly distribute them atop the cheese for a rich, savory flavor profile. This creates a mouthwatering combination that kids and adults will love in these Mini Grilled Cheese Hawaiian Rolls.
Step 4: Replace the Top Half and Prepare for Baking
Carefully place the top half of the sliced rolls back over the cheese and fillings. In a small bowl, combine melted butter, garlic powder, onion powder, and mixed herbs. Brush this mixture generously across the top of the rolls to enhance their golden, crispy surface as they bake.
Step 5: Press and Bake Covered
Gently press the top of the rolls down to ensure the cheese melts evenly without pooling at the edges. Cover the baking tray with aluminum foil and place it in the preheated oven. Bake for 10 minutes to help the cheese begin to melt and the rolls warm through.
Step 6: Uncover and Finish Baking
After the initial 10 minutes, carefully remove the foil to allow the tops of the Mini Grilled Cheese Hawaiian Rolls to crisp up. Bake uncovered for an additional 8 minutes or until the tops are golden brown and the cheese is thoroughly melted, creating a delightful texture.
Step 7: Add Extra Butter (Optional)
If you want an extra touch of flavor and shine, remove the rolls from the oven and immediately brush the tops with more melted butter. This step gives the rolls an appealing gloss and enhances the overall taste of your Mini Grilled Cheese Hawaiian Rolls.
Step 8: Cool and Serve
Allow the rolls to cool slightly before serving, ensuring the gooey cheese isn’t too hot for eager hands. Slice them into individual portions, and enjoy the warm, comforting flavors that come together in every bite of these delightful rolls!
Expert Tips for Mini Grilled Cheese Hawaiian Rolls
-
Cheese Selection: Choose a mix of cheeses for the best flavor. Combining cheddar and mozzarella creates a cheesy stretch and richness in these Mini Grilled Cheese Hawaiian Rolls.
-
Heat Without Toughness: Avoid the microwave for reheating. Instead, return leftovers to the oven for a few minutes to maintain softness without toughening up the rolls.
-
Pressing Technique: Lightly pressing the rolls before baking helps prevent cheese from pooling at the edges, ensuring an even melt that enhances the overall texture.
-
Flavor Elevation: Don’t skip the garlic powder and herbs in the butter mixture. They add a depth of flavor that takes these little bites to the next level.
-
Customizable Fillings: Feel free to experiment with different fillings like turkey bacon or roasted veggies. Just remember that moisture-rich ingredients should be used sparingly to avoid sogginess.
Mini Grilled Cheese Hawaiian Rolls Variations
Feel free to sprinkle your own flair into these comfort-filled rolls! Let your taste buds lead the way to a delightful culinary adventure.
-
Cheese Swap: Mix cheddar with mozzarella for a creamy stretch, or try sharp gouda for a bold punch. Cheese lovers will delight in exploring various combinations!
-
Veggie Boost: Add spinach, roasted red peppers, or caramelized onions to increase flavor and nutrition. These wholesome additions transform the rolls into a colorful delight.
-
Protein Options: Substitute bacon with thinly sliced grilled chicken or turkey ham for a lighter touch. Don’t hesitate to explore savory meats that tantalize your taste buds!
-
Herb Infusion: Replace mixed herbs with fresh basil or oregano for a fragrant twist. These herbs can elevate your rolls to gourmet status with their aromatic charm.
-
Sweet Twist: Add a layer of sautéed apples or pears for a hint of sweetness that contrasts beautifully with cheese. This variation is sure to surprise and delight!
-
Spice it Up: Introduce jalapeños or pepper jack cheese for a zesty kick. For those who enjoy a little heat, this variation is an exciting way to change things up.
-
Try Different Breads: Experiment with pretzel rolls or sourdough for a unique texture and flavor. Each bread choice brings its own character, ensuring every bite is a new experience.
For more cheesy inspirations, don’t miss out on my delightful Onion Goat Cheese tarts or stick around for some tempting Boston Cream Rolls. Enjoy customizing your Mini Grilled Cheese Hawaiian Rolls!
How to Store and Freeze Mini Grilled Cheese Hawaiian Rolls
Fridge: Store leftover Mini Grilled Cheese Hawaiian Rolls in an airtight container for up to 3 days. Reheat in the oven at 325°F (165°C) for best results, preserving their delicious texture.
Freezer: For longer storage, freeze the assembled, unbaked rolls wrapped tightly in plastic wrap or aluminum foil for up to 2 months. Bake from frozen, adding a few extra minutes to the cooking time.
Make-Ahead: You can prepare these rolls in advance; assemble and refrigerate unbaked for up to 24 hours. Simply pop them in the oven when ready to bake that comforting goodness!
Reheating: Avoid the microwave for reheating, as it may make the rolls tough. Instead, use the oven or a toaster oven to maintain their soft, gooey interior and crispy exterior.
Make Ahead Options
These Mini Grilled Cheese Hawaiian Rolls are a fantastic choice for meal prep, saving you time on busy weeknights! You can assemble the rolls, layering cheese and any optional fillings, and refrigerate them unbaked for up to 24 hours. Just cover them tightly with plastic wrap to maintain freshness and prevent the rolls from drying out. When you’re ready to bake, simply remove the wrap, brush with the delicious melted butter mixture, and heat them in the oven for the same baking time as instructed. You can also store leftovers in an airtight container for up to 3 days; just reheat in the oven to restore their crispy edge. Get ready to enjoy these comforting bites with minimal effort!
What to Serve with Mini Grilled Cheese Hawaiian Rolls
Creating a complete meal is easy with the delightful combination of flavors and textures that complement these savory bites.
-
Tomato Soup: A classic pairing that balances the richness of the cheese. Its tangy acidity cuts through the creaminess, creating a comforting duo.
-
Crispy Green Salad: Fresh greens with a light vinaigrette add a crisp, refreshing texture, perfect for brightening up your meal without overwhelming it.
-
Roasted Vegetables: Seasonal veggies caramelized in olive oil bring an earthy sweetness that complements the Hawaiian rolls beautifully. Think zucchini, bell peppers, and carrots for a colorful mix.
-
Creamy Coleslaw: The crunchiness and tangy flavor of coleslaw enhance the warm, cheesy rolls, creating a fun contrast in texture and taste.
-
Garlic Breadsticks: For the bread lovers at your table, garlic breadsticks serve as a fun sidekick, providing a delicious means of mopping up any soup or sauce.
-
Fruit Skewers: Add a touch of sweetness with vibrant fruit, which contrasts the savory rolls spectacularly—opt for melons, strawberries, or pineapple for a tropical twist.
-
Airy Lemonade: This refreshing drink’s citrusy zing refreshes the palate, working wonders alongside the comforting warmth of your Mini Grilled Cheese Hawaiian Rolls.
-
Mini Cupcakes: For a delightful dessert, serve mini cupcakes. Their sweetness beautifully rounds off the meal and keeps the cheerful vibe alive.
Mini Grilled Cheese Hawaiian Rolls Recipe FAQs
What type of Hawaiian rolls work best for this recipe?
Absolutely! The original sweet Hawaiian rolls are perfect as they provide a soft texture and subtle sweetness, enhancing the flavor of the cheese. However, if you’re in a pinch, other soft slider buns can be used as a substitute—just keep an eye on their size to ensure it fits well with your cheese layers!
How should I store leftover Mini Grilled Cheese Hawaiian Rolls?
I recommend placing any leftover rolls in an airtight container in the refrigerator where they will last for up to 3 days. When you’re ready to enjoy them again, reheat in the oven at 325°F (165°C) for about 10-15 minutes to restore their delightful texture—you want that gooey center back in action!
Can I freeze Mini Grilled Cheese Hawaiian Rolls?
Yes, indeed! For longer storage, you can freeze the unbaked assembled rolls wrapped tightly in plastic wrap or aluminum foil for up to 2 months. When you’re ready to bake, there’s no need to thaw—just pop them in the oven, adding a few extra minutes to the cooking time. They’ll be just as delicious!
What if my cheese isn’t melting well?
Very important! If your cheese isn’t melting as expected, pressing down on the rolls before baking can help achieve even melting. Additionally, covering the pan with foil during the first half of baking promotes steam and keeps the cheese gooey, so this step should not be skipped.
Are there any dietary considerations if I want to share these with my pets?
While Mini Grilled Cheese Hawaiian Rolls are a tasty treat for humans, it’s best to avoid sharing them with pets, especially because of the cheese, butter, and potentially high-fat content which can upset their stomachs. Always check with your veterinarian if you’re unsure about specific ingredients!
Can I customize the fillings in the Mini Grilled Cheese Hawaiian Rolls?
Absolutely! The more, the merrier! You can add fillings like cooked thinly sliced grilled chicken, turkey bacon, or roasted veggies such as spinach and red peppers for an extra nutritional boost. Just be cautious with moisture-rich ingredients to avoid sogginess in your rolls!
Melt-in-Your-Mouth Mini Grilled Cheese Hawaiian Rolls
Ingredients
Equipment
Method
- Preheat your oven to 350°F (175°C). Gather your ingredients and equipment.
- Slice the Hawaiian rolls horizontally as one continuous piece.
- Layer your choice of cheese across the bottom half of the Hawaiian rolls.
- Place the top half of the rolls back over the cheese. Brush with the butter mixture.
- Press the top of the rolls down and cover with aluminum foil. Bake for 10 minutes.
- Remove foil and bake for an additional 8 minutes until golden brown.
- Brush the tops with more melted butter if desired and allow to cool slightly.
- Slice into individual portions and serve warm.
Leave a Reply