
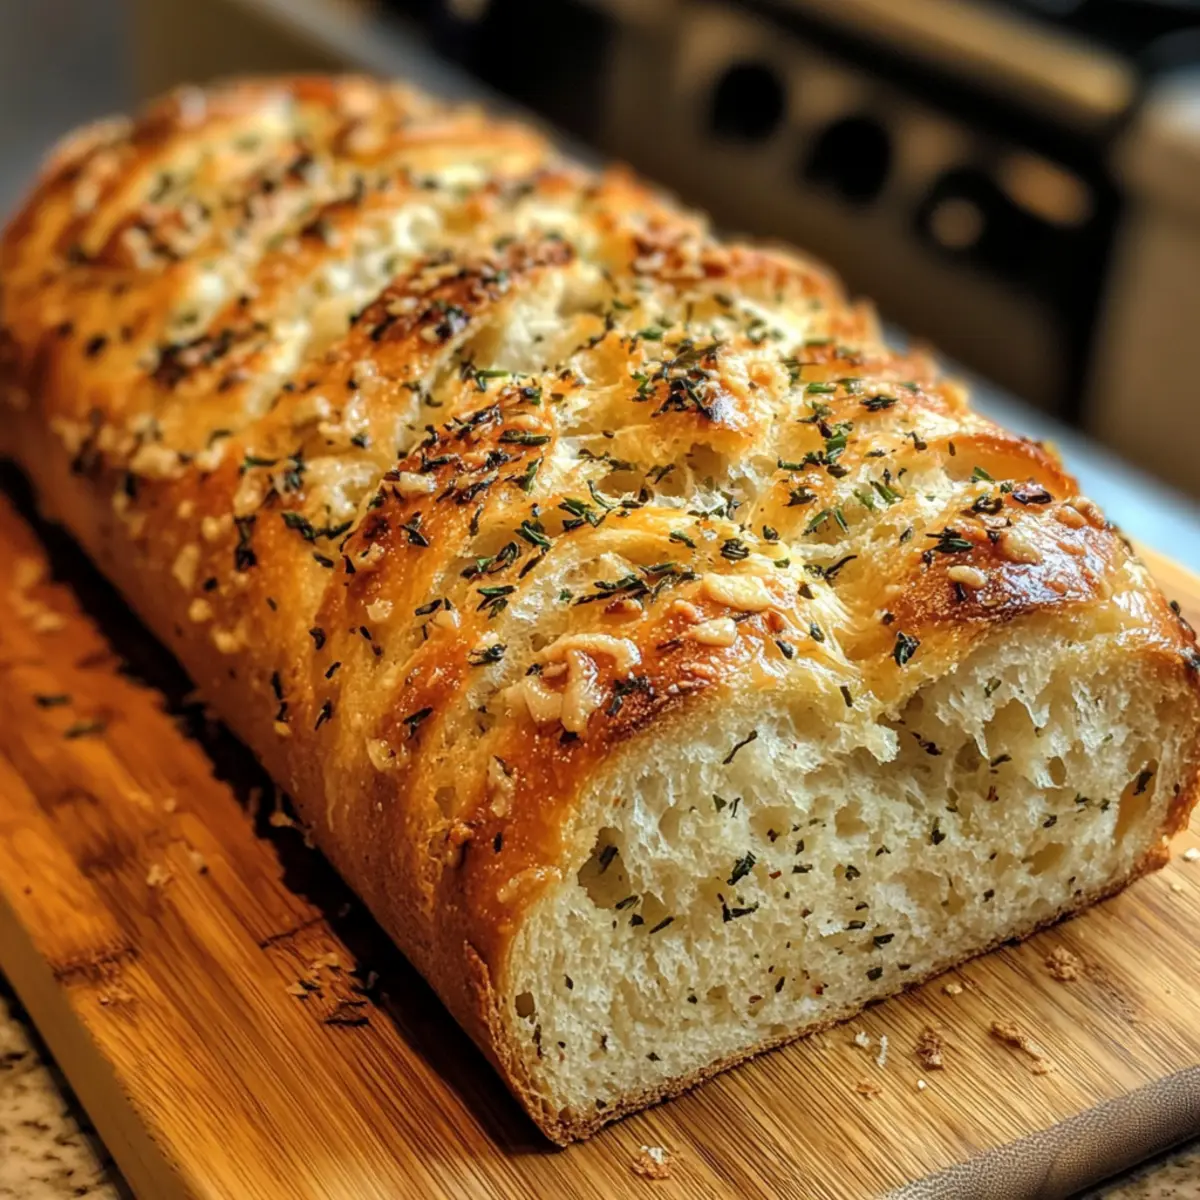
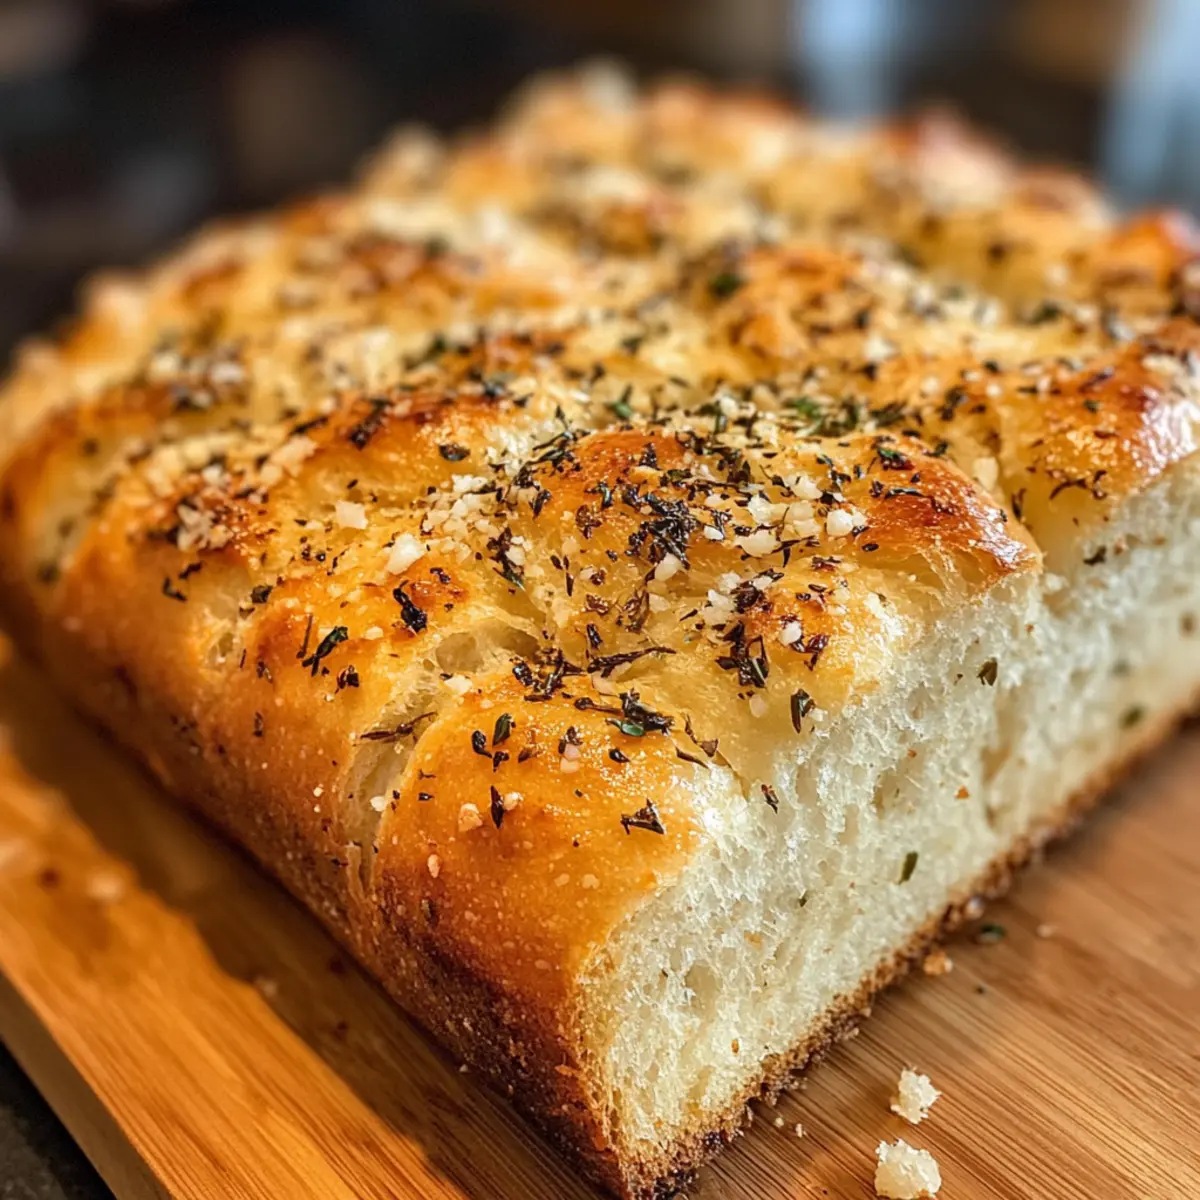
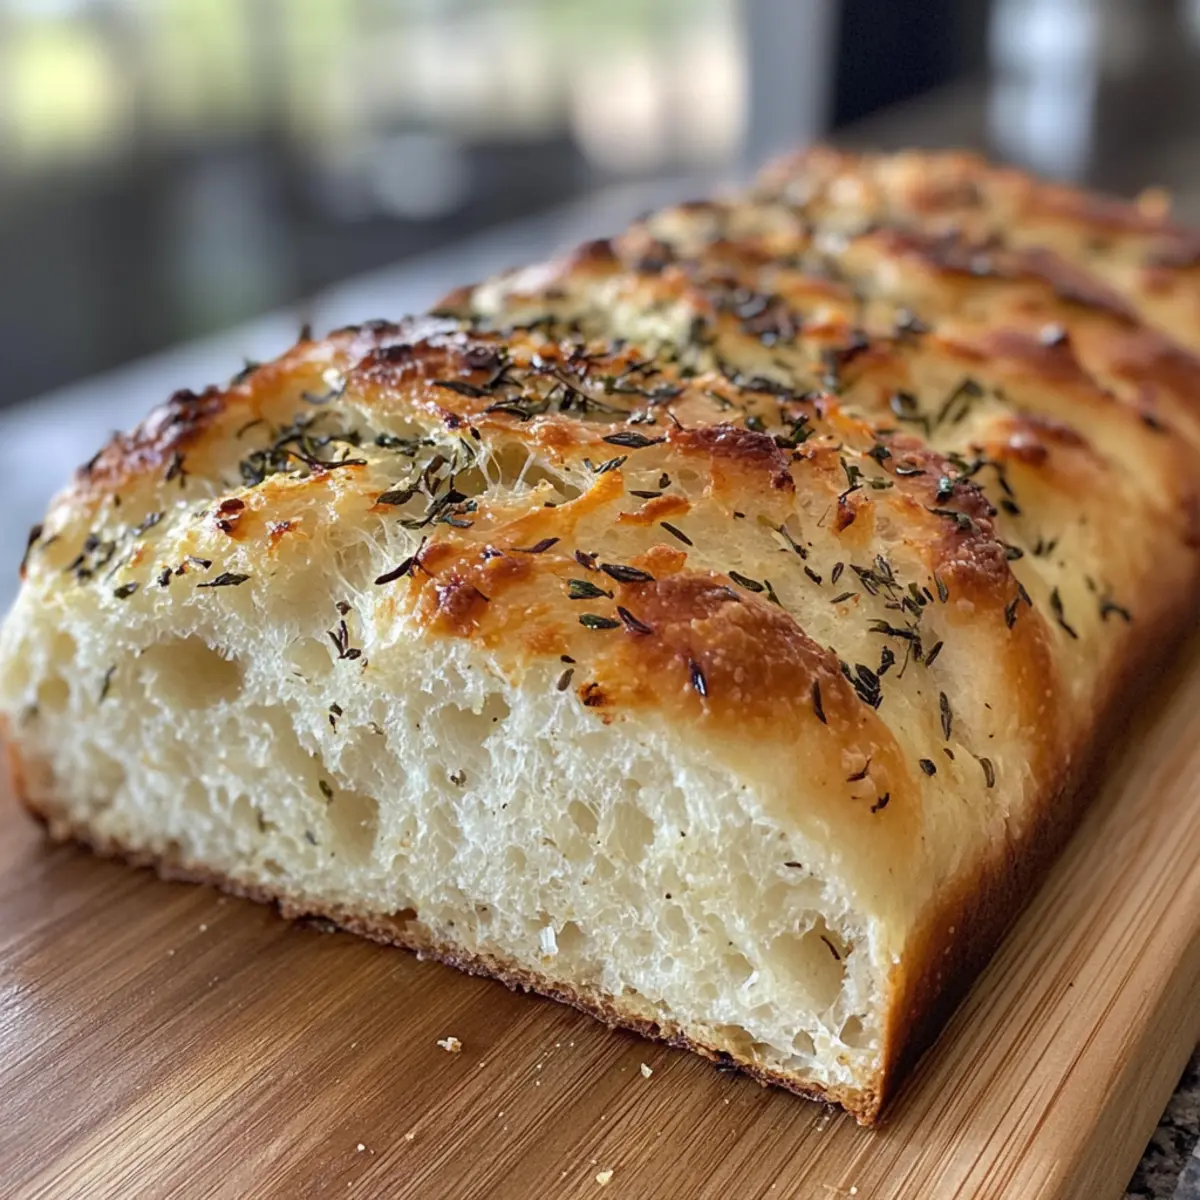
There’s something special about the first whiff of warm, freshly baked bread that fills a room, right? It’s a feeling that wraps around you like a cozy blanket. My Garlic Parmesan Herb Bread embodies exactly that—an easy-to-make delight that’s ready to become your go-to recipe for impressing family and friends. With a heavenly combination of savory garlic, sharp parmesan, and fragrant herbs, this vegetarian loaf brings gourmet flavors to your table in just over an hour. Not only is it perfect as a delightful side for soups or salads, but it also makes a fantastic centerpiece during any meal. Are you ready to unleash the irresistible aroma of homemade bread in your kitchen? Let’s get baking!
Why Should You Bake This Bread?
Ease of Preparation: With just a few simple ingredients, this Garlic Parmesan Herb Bread is perfect for home cooks of any skill level.
Irresistible Aroma: Imagine the savory scent of garlic and herbs wafting through your kitchen, inviting everyone to the table.
Versatile Pairing: This bread shines as a side with soups, salads, or any pasta dish, making it a fantastic addition to every meal.
Customizable Flavor: Feel free to mix in different cheeses or fresh herbs for personalized flavor experiences each time you bake.
Quick Baking Time: In just over an hour, you can serve warm, delicious bread directly from your oven. Don’t forget to check out more quick and easy recipes to keep your meal planning exciting!
Garlic Parmesan Herb Bread Ingredients
For the Bread
- Warm Water – Activates the yeast; ensure it’s between 100-110°F for proper fermentation.
- Granulated Sugar – Feeds the yeast for effective rising.
- Instant Dry Yeast – The leavening agent that helps the bread rise beautifully.
- Salt – Enhances flavor and keeps yeast activity in check.
- Minced Garlic – Delivers robust flavor; adjust quantity for a stronger or milder garlic taste.
- Dried Herbs (e.g., oregano, basil) – Infuses the bread with lovely aroma and flavor; feel free to swap for fresh herbs (use 3x the amount).
- All-Purpose Flour – Provides the necessary structure; adjust to achieve the right dough consistency.
- Grated Parmesan Cheese – Adds a rich depth of flavor; for variations, substitute with mozzarella or provolone.
- Butter – Brush on top before baking for a beautifully golden crust.
Notes: Don’t forget that this Garlic Parmesan Herb Bread is vegetarian-friendly!
Step‑by‑Step Instructions for Garlic Parmesan Herb Bread
Step 1: Prepare Yeast
In a large mixing bowl, combine 1 cup of warm water (100-110°F), 1 tablespoon of granulated sugar, and 2 teaspoons of instant dry yeast. Stir gently and let it sit for about 5 minutes until the mixture becomes frothy, indicating that the yeast is activated and ready to work its magic in your Garlic Parmesan Herb Bread.
Step 2: Mix Dough
Once the yeast mixture is bubbly, add 1 teaspoon of salt, 4 cloves of minced garlic, 1 tablespoon of dried herbs, and 3 cups of all-purpose flour. Gradually mix in 1 cup of grated parmesan cheese to form a sticky dough. Use a wooden spoon or your hands to combine the ingredients until everything is evenly incorporated and dough begins to pull away from the sides of the bowl.
Step 3: Knead Dough
Transfer the sticky dough to a lightly floured surface. Knead the dough for about 8-10 minutes, adding a little flour as needed until the dough is smooth and elastic. You should be able to stretch it without tearing, creating a lovely texture that will make your Garlic Parmesan Herb Bread irresistibly soft.
Step 4: First Rise
Place the kneaded dough in an oiled bowl, turning it to coat all sides. Cover the bowl with a clean kitchen towel or plastic wrap and let the dough rise in a warm, draft-free area for about 1 hour, or until it has doubled in size. This is when the magic happens, so check back and look for the dough puffing up beautifully!
Step 5: Shape Loaves
Once the dough has risen, punch it down gently to release air. Divide the dough into two equal portions and shape each into a round loaf. Carefully place the shaped loaves onto a greased baking sheet, giving them enough space to rise again. This Garlic Parmesan Herb Bread will start to come to life in the next step!
Step 6: Second Rise
Cover the shaped loaves with a towel and let them rise for 15-20 minutes while preheating your oven to 375°F. Take a moment to admire how the dough puffs up again, making for a light and airy bread that will be heavenly once baked.
Step 7: Bake
Before placing the loaves in the oven, brush the tops with melted butter for a golden, glossy finish. Bake them in the preheated oven for 18-20 minutes, or until the loaves are golden brown and sound hollow when tapped on the bottom. The inviting aroma of your Garlic Parmesan Herb Bread will fill the kitchen as they bake!
Step 8: Cool
After baking, remove the loaves from the oven and transfer them to a cooling rack. Allow them to cool slightly for about 10-15 minutes before slicing. This step enhances the flavor and texture, ensuring each slice of your Garlic Parmesan Herb Bread is perfectly delicious!
Garlic Parmesan Herb Bread Variations
Feel free to play with this recipe to create a loaf that suits your tastes and dietary needs!
- Fresh Herbs: Substitute dried herbs for fresh—simply use three times the amount for a brighter flavor.
- Cheese Variety: Add mozzarella or provolone for a creamy twist. Mixing cheeses can elevate your bread beyond the standard recipe.
- Garlic Lovers: Increase the minced garlic for a stronger punch, bringing a bolder flavor to your bread that garlic aficionados will love.
- Savory Spice: Sprinkle in red pepper flakes for a hint of heat. This subtle kick can transform your Garlic Parmesan Herb Bread into a delightful spicy treat.
- Grain Swap: Use whole wheat flour instead of all-purpose for a heartier texture and added nutrition. It’s a perfect way to elevate everyday bread into a nourishing delight.
- Herb Fusion: Combine different herbs such as thyme and rosemary for a unique flavor profile; it’ll be a delightful surprise bite after bite.
- Olive Oil Brush: Instead of butter, brush the loaves with olive oil before baking for a Mediterranean flair while keeping everything vegetarian-friendly.
- Cheesy Crust: Top with a sprinkle of extra cheese just before baking for a crispy, cheesy crust that’ll have everyone coming back for seconds!
For more delightful ideas, check out our Homemade Garlic Butter recipe that pairs beautifully with this bread. And if you’re in a bind, consider our Quick and Easy Dinner Recipes collection to accompany your freshly baked loaf!
Make Ahead Options
Garlic Parmesan Herb Bread is an excellent choice for meal prep, ensuring you have a delicious side ready for any occasion! You can prepare the dough and let it complete the first rise up to 24 hours in advance; simply cover the oiled bowl with plastic wrap and refrigerate. When you’re ready to bake, take the dough out and allow it to come to room temperature before shaping and proceeding with the second rise. Pre-shaped loaves can also be stored in the fridge for up to 3 days; just make sure to cover them well to prevent drying out. This way, you’ll enjoy warm, freshly baked bread that’s just as delightful with minimal effort on busy weeknights!
Expert Tips for Garlic Parmesan Herb Bread
- Temperature Matters: Use warm water (100-110°F) to activate the yeast effectively—water that’s too hot will kill it and ruin your bread.
- Sticky Dough Solution: If the dough feels too sticky when kneading, gradually sprinkle in more flour until you achieve a smooth, elastic texture.
- Second Rise Perfection: Cover the dough with a clean towel during its second rise; this prevents it from drying out, ensuring a soft, tender loaf.
- Flavor Boost: Don’t hesitate to adjust the minced garlic quantity according to your taste preferences; it can elevate the garlic flavor in your Garlic Parmesan Herb Bread.
- Storing Leftovers: Store your leftover bread in an airtight container for up to three days, or freeze it for up to three months to keep the flavors locked in.
How to Store and Freeze Garlic Parmesan Herb Bread
Fridge: Store your Garlic Parmesan Herb Bread in an airtight container for up to 3 days to maintain its freshness and flavor.
Freezer: Wrap the bread tightly in plastic wrap or aluminum foil, then place it in a resealable freezer bag. It can be frozen for up to 3 months without losing its delightful taste.
Reheating: To enjoy your bread again, thaw it in the fridge overnight, then warm it in the oven at 350°F for about 10 minutes until heated through.
Room Temperature: If you plan to eat it within a day or two, simply keep the bread wrapped in a clean kitchen towel at room temperature to retain its softness.
What to Serve with Garlic Parmesan Herb Bread
There’s nothing quite like pairing freshly baked bread with delicious accompaniments to elevate your meal experience.
- Savory Soup: A steaming bowl of tomato basil or minestrone soup complements the warm, herby flavors of the bread beautifully, creating a cozy symphony of tastes.
- Fresh Salad: A colorful mixed greens salad with a tangy vinaigrette adds brightness and crunch, balancing the bread’s dense texture with its light and refreshing ingredients.
- Roasted Vegetables: Caramelized zucchini, bell peppers, and carrots bring a sweet and earthy element that pairs perfectly with the savory garlic and parmesan notes.
- Creamy Pasta: Dishes like fettuccine alfredo or pesto pasta make an indulgent pairing, as they soak up the delicious bread’s flavors, offering a hearty and filling meal.
- Cheese Platter: Variety cheeses such as brie or gouda paired with olives and nuts create a rustic board that highlights the rich parmesan while pleasing any palate.
- Herbal Iced Tea: Refreshing herbal iced tea served on the side can cleanse the palate, making each bite of garlic parmesan herb bread all the more enjoyable.
- Chocolate Dessert: For a sweet ending, serving with warm chocolate cake or brownies provides a rich contrast, ensuring a delightful finish to your meal.

Garlic Parmesan Herb Bread Recipe FAQs
What kind of water should I use for the yeast?
You should use warm water between 100-110°F to activate the yeast effectively. If the water is too hot, it can kill the yeast, so make sure to check the temperature with a thermometer or your wrist; it should feel warm, not hot!
How should I store leftover Garlic Parmesan Herb Bread?
Store your Garlic Parmesan Herb Bread in an airtight container at room temperature for up to 3 days to keep it fresh. If you want to keep it longer, wrap the bread tightly in plastic wrap or aluminum foil and place it in a resealable freezer bag. It can be frozen for up to 3 months.
How can I reheat the frozen bread?
To enjoy your frozen Garlic Parmesan Herb Bread, simply thaw it in the fridge overnight. Then, preheat your oven to 350°F and warm the bread for about 10 minutes until heated through. This will help revive its wonderful aroma and texture.
What can I do if my dough is too sticky?
If you’re finding the dough too sticky while kneading, don’t worry! Gradually sprinkle in additional flour—just a tablespoon at a time—until the dough takes on a smooth and elastic consistency. Knead it until it feels just right, and you’ll have a beautiful bread!
Can I use fresh herbs instead of dried herbs?
Absolutely! If you prefer fresh herbs, just use three times the amount compared to dried herbs. For instance, if the recipe calls for 1 tablespoon of dried herbs, swap it for 3 tablespoons of fresh herbs. This will give your Garlic Parmesan Herb Bread a delightful fresh flavor.
Is this recipe suitable for vegetarians?
Yes, this Garlic Parmesan Herb Bread is vegetarian-friendly! It’s perfect for those who enjoy delicious homemade bread without any animal products in it. Enjoy it as a perfect side for your favorite vegetarian meals!
Garlic Parmesan Herb Bread: Your New Favorite Homemade Delight
Ingredients
Equipment
Method
- In a large mixing bowl, combine warm water, granulated sugar, and instant dry yeast. Stir gently and let it sit for about 5 minutes until frothy.
- Once the yeast mixture is bubbly, add salt, minced garlic, dried herbs, and all-purpose flour. Gradually mix in grated parmesan cheese to form a sticky dough.
- Transfer the sticky dough to a floured surface and knead for about 8-10 minutes until smooth and elastic.
- Place the kneaded dough in an oiled bowl, cover, and let it rise for about 1 hour until doubled in size.
- Punch down gently, divide into two portions, and shape into round loaves. Place on a greased baking sheet.
- Cover the loaves and let them rise for 15-20 minutes while preheating your oven to 375°F.
- Brush the tops with melted butter and bake for 18-20 minutes until golden brown.
- Cool the loaves on a rack for 10-15 minutes before slicing.
Leave a Reply