
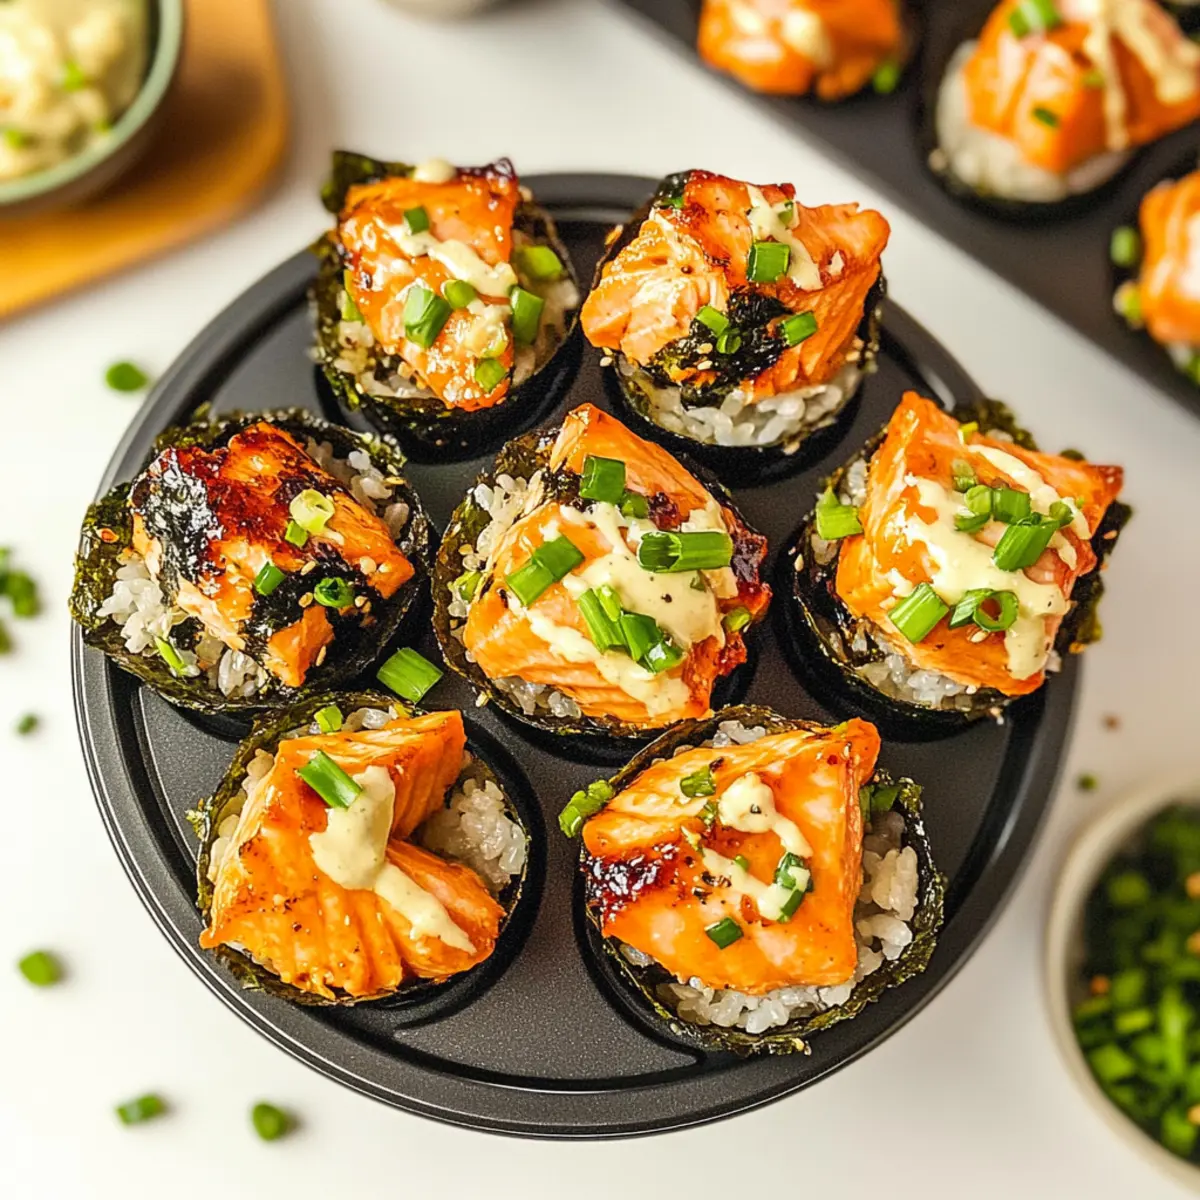
A delightful twist on a classic favorite, these Easy Baked Salmon Sushi Cups are about to become your go-to appetizer! Imagine savoring tender salmon nestled in perfectly seasoned sushi rice, all wrapped in crispy nori and topped with a drizzle of spicy mayo and green onions. Perfectly versatile, they shine at gatherings or as a cozy weeknight meal, making them both a crowd-pleaser and a comforting dish for sushi enthusiasts. What’s more, they are simple to prepare—ideal for those bustling days when you crave something special without spending hours in the kitchen. Ready to take your taste buds on a flavorful journey? Let’s dive into this mouthwatering recipe!
Why Are These Sushi Cups a Must-Try?
Simplicity: You don’t need culinary expertise to Whip Up These Baked Salmon Sushi Cups! This step-by-step recipe ensures even beginners can achieve sushi brilliance.
Flavor Explosion: The delightful blend of tender salmon, seasoned sushi rice, and spicy mayo creates an irresistible taste that will have your guests coming back for seconds.
Versatile Dish: Whether served at a party or as a casual dinner with a side of pickled ginger and cucumber salad, these cups fit seamlessly into any occasion.
Quick Prep Time: With only 15 minutes in the oven, you’ll have a delicious appetizer ready in no time, making it perfect for busy weeknights or last-minute get-togethers.
Crowd-Pleasing: Loved by sushi fans and newcomers alike, these Baked Salmon Sushi Cups cater to a range of tastes, delighting everyone at your table.
Baked Salmon Sushi Cups Ingredients
Discover the essential ingredients for making delightful Baked Salmon Sushi Cups!
For the Salmon Filling
- Salmon – Use fresh or high-quality canned salmon for a tender filling.
- Light Soy Sauce – Adds a delicious umami flavor; low-sodium soy sauce can be a healthier alternative.
- Kewpie Mayo – This creamy dressing brings tang; swap with regular mayonnaise or Greek yogurt for a lighter spin.
- Sriracha – Add some spice; adjust to taste or omit if you prefer a milder flavor.
- Sesame Oil – Enhances the flavor with a nutty undertone; use vegetable oil if you’re out of sesame oil.
For the Sushi Rice
- Sushi Rice – The cornerstone of these cups; short-grain rice can be a good substitute.
- Rice Vinegar – Adds acidity; apple cider vinegar works in a pinch.
- White Sugar – Balances the flavors; honey or agave can serve as natural sweeteners if desired.
For the Wrapping and Garnish
- Nori Sheets – Essential for wrapping; consider rice paper for a gluten-free alternative.
- Furikake – A delightful garnish that adds texture; you can skip it or use sesame seeds instead.
- Green Onions – Freshly chopped for garnish; chives or cilantro are great substitutes.
Others
- Cooking Spray – Prevents sticking in your muffin tin; any preferred cooking oil or butter can do the job.
These Baked Salmon Sushi Cups come together beautifully with these ingredients, ensuring a mouthwatering experience that everyone will adore!
Step‑by‑Step Instructions for Baked Salmon Sushi Cups
Step 1: Prepare Sushi Rice
Begin by cooking sushi rice according to the package instructions, which typically takes about 15-20 minutes. Once cooked, transfer the rice to a mixing bowl and gently fold in rice vinegar and sugar to give it that signature sushi flavor. The rice should feel sticky when properly seasoned. Allow it to cool slightly while you prepare the filling.
Step 2: Mix Salmon Filling
In a separate bowl, combine cubed salmon, light soy sauce, Kewpie mayo, sriracha, and sesame oil. Mix gently until the salmon is evenly coated, allowing the flavors to meld together. This savory mixture should have a creamy consistency with a hint of heat from the sriracha. Set aside to let the flavors marry while you preheat the oven.
Step 3: Preheat Oven
Preheat your oven to 400°F (200°C). This temperature is essential for achieving that perfect golden finish on your Baked Salmon Sushi Cups. Make sure your oven is fully heated before you bake, as this will help create a crispy exterior while keeping the salmon moist and tender inside.
Step 4: Assemble Cups
While the oven is preheating, cut nori sheets into squares that fit into the cups of a lightly greased muffin tin. Gently press the nori squares into the muffin cavities to form little cups. Then, fill each cup with the prepared sushi rice, pressing it down lightly, and top each with a generous spoonful of the salmon mixture, distributing evenly.
Step 5: Bake
Carefully place the muffin tin in the preheated oven and bake for 15 minutes. Keep an eye on your Baked Salmon Sushi Cups; they should be golden and the salmon fully cooked. The nori will crisp up nicely while the salmon stays flavorful and moist beneath its golden crust.
Step 6: Garnish and Serve
Once baked, remove the sushi cups from the oven and let them cool for a couple of minutes. Drizzle with extra sriracha and spicy mayo for an additional kick, then sprinkle with furikake and freshly chopped green onions. Serve immediately for the best flavor and enjoy this delightful twist on sushi night with family or friends.

Make Ahead Options
These Baked Salmon Sushi Cups are perfect for meal prep, allowing you to savor delicious flavors without the last-minute rush! You can prepare the sushi rice and salmon filling up to 24 hours in advance. Cook the rice and mix it with rice vinegar and sugar, then store it in an airtight container in the refrigerator. For the salmon filling, combine the ingredients and refrigerate separately. When you’re ready to bake, simply assemble the cups by pressing the rice into nori squares and topping with the salmon mixture. Bake for about 15 minutes, and you’ll have just as delightful sushi cups that impress with minimal effort on busy nights!
Storage Tips for Baked Salmon Sushi Cups
-
Fridge: Store leftover Baked Salmon Sushi Cups in an airtight container for up to 2-3 days. This keeps them fresh and maintains their delicious flavor.
-
Freezer: If you want to save some for later, freeze the sushi cups individually wrapped in plastic wrap and placed in a freezer-safe bag for up to 2 months. Thaw before reheating.
-
Reheating: To enjoy leftovers, reheat in the oven at 350°F for about 10 minutes until warmed through. Alternatively, you can use a microwave, but the oven helps retain crispiness.
-
Avoiding Soggy Nori: For best results, reheat the cups in the oven to crisp up the nori again. This guarantees a delightful crunch accompanying the savory salmon filling!
What to Serve with Easy Baked Salmon Sushi Cups
Elevate your meal with delightful pairings that enhance the flavors of your sushi cups and satisfy your taste buds.
- Cucumber Salad: A refreshing counterpart that balances the richness of the sushi cups, bursting with crisp textures and light vinegar dressing.
- Edamame Beans: These lightly salted legumes add a fun pop of color and a protein boost, making for a nutritious side that’s easy to prepare.
- Miso Soup: Warm and comforting, miso soup offers a umami depth that complements the baked salmon sushi cups beautifully.
- Teriyaki Chicken Skewers: Their sweet and savory glaze melds well with the sushi flavors, creating a delicious fusion experience that delights the palate.
- Ginger Soy Dipping Sauce: A zesty dip enhances the sushi cups’ taste and adds an extra layer of flavor that can’t be resisted.
- Pickled Vegetables: Their tangy crunch creates a wonderful contrast, cleansing the palate and brightening the meal with vibrant flavors.
These pairings not only boost the meal’s appeal but also guarantee satisfaction that will leave your guests raving about the entire dining experience!
Expert Tips for Baked Salmon Sushi Cups
-
Fresh Ingredients Matter: The quality of your salmon significantly impacts the overall flavor. Opt for fresh salmon for the best taste and texture in your Baked Salmon Sushi Cups.
-
Sticky Rice is Key: Ensure that the sushi rice is properly seasoned and sticky enough to hold together. Test it by pressing a small amount—it should clump together without falling apart.
-
Watch the Baking Time: Avoid overbaking your sushi cups. Keep an eye on them during the last few minutes to ensure they’re golden without drying out the salmon.
-
Nori Preparation: Lightly greasing the muffin tin helps the nori cups to maintain their shape. Be careful not to skip this step, as it prevents sticking and helps with easy removal.
-
Customize Your Filling: Don’t be afraid to get creative! You can swap the salmon for cooked shrimp or crab, or add a medley of veggies for a unique twist while still keeping them as delightful Baked Salmon Sushi Cups.
-
Serve Immediately: For the best experience, serve these cups right out of the oven. They are at their crispiest and most delicious shortly after baking, making them perfect for gatherings!
Baked Salmon Sushi Cups Variations
Feel free to unleash your creativity and make these Baked Salmon Sushi Cups your own!
-
Seafood Swap: Substitute salmon with cooked shrimp or crab for a completely different flavor profile. The sweetness of shrimp pairs deliciously with the creamy mayo!
-
Veggie Boost: Incorporate shredded carrots or diced cucumbers for added crunch and freshness. The garden-fresh taste elevates the sushi cups to another level.
-
Spicy Kick: For more heat, add pickled jalapeños or sliced green chilies to the salmon mixture. This fiery twist will have your taste buds dancing!
-
Dairy-Free Delight: Use avocado instead of Kewpie mayo for a creamy, dairy-free alternative. This adds a rich, smooth texture and healthy fats!
-
Crispy Topping: Sprinkle panko breadcrumbs on top before baking for an extra crispy layer. It adds delightful texture and a new dimension to each bite.
-
Flavor Fusion: Mix in some Thai chili paste for a Southeast Asian twist, or drizzle with teriyaki sauce after baking for a sweet and savory finish.
-
Alternative Wrap: If you want to avoid nori, consider using rice paper or lettuce leaves for a gluten-free and fresh approach. It’s a fun way to change the texture while still enjoying the flavors!
-
Garnish Variety: Top with sesame seeds or microgreens instead of furikake for a unique presentation. These add a lovely visual appeal while enhancing the flavor.
Explore these variations to make your Baked Salmon Sushi Cups uniquely yours, and don’t forget to serve them alongside some tangy pickled ginger and a refreshing cucumber salad for a delightful meal!

Baked Salmon Sushi Cups Recipe FAQs
How do I choose the best salmon for the recipe?
Absolutely! For the best flavor and texture, I recommend using fresh salmon that is firm and has a bright color, free from any gray spots or discoloration. If fresh isn’t an option, high-quality canned salmon will also work beautifully. Just make sure it’s from a reputable brand, and drain it well before mixing into your filling.
What’s the best way to store leftover Baked Salmon Sushi Cups?
You can store leftover Baked Salmon Sushi Cups in an airtight container in the refrigerator for up to 2-3 days. If you plan to enjoy them later, it’s best to reheat in the oven at 350°F for about 10 minutes to keep that delicious, crispy texture!
Can I freeze these sushi cups for later?
Certainly! To freeze Baked Salmon Sushi Cups, wrap them individually in plastic wrap and place them in a freezer-safe bag. They can be stored in the freezer for up to 2 months. When you’re ready to enjoy, simply thaw in the refrigerator overnight and reheat them in the oven at 350°F until heated through.
What if the sushi rice is not sticky enough?
No worries! If you find that your sushi rice isn’t sticky enough to hold together, you can quickly fix this by adding a bit more rice vinegar while it’s still warm. Another option is to mix in a small amount of water or a food-grade tapioca starch to help achieve that perfect sushi consistency.
Are there any dietary considerations for this dish?
Very! If you’re cooking for someone with allergies, be mindful of the soy sauce, which contains gluten. Substituting with a gluten-free soy sauce can make your Baked Salmon Sushi Cups suitable for gluten-sensitive individuals. Additionally, if serving pets or individuals with fish allergies, ensure alternative ingredients are used, like cooked chicken or tofu for a vegetarian option.
Can I make these sushi cups ahead of time?
Absolutely! To prepare them ahead of time, you can assemble the Baked Salmon Sushi Cups and place them in the fridge (covered) for up to 24 hours before baking. When you’re ready, just pop them straight into a preheated oven. This way, you’ll have a delicious dish ready to serve without any last-minute fuss!

Baked Salmon Sushi Cups: A Simple Twist on Sushi Night
Ingredients
Equipment
Method
- Begin by cooking sushi rice according to the package instructions, typically taking about 15-20 minutes. Once cooked, fold in rice vinegar and sugar to give it that signature sushi flavor. Allow to cool slightly.
- In a separate bowl, combine cubed salmon, light soy sauce, Kewpie mayo, sriracha, and sesame oil. Mix gently until the salmon is evenly coated.
- Preheat your oven to 400°F (200°C).
- Cut nori sheets into squares and press them into the muffin cavities to form cups. Fill with sushi rice and top with the salmon mixture.
- Bake for 15 minutes until golden. Keep an eye on them; they should be crispy but not overbaked.
- Remove from oven, let cool slightly, and garnish with extra sriracha, mayo, furikake, and green onions. Serve immediately.
Leave a Reply